
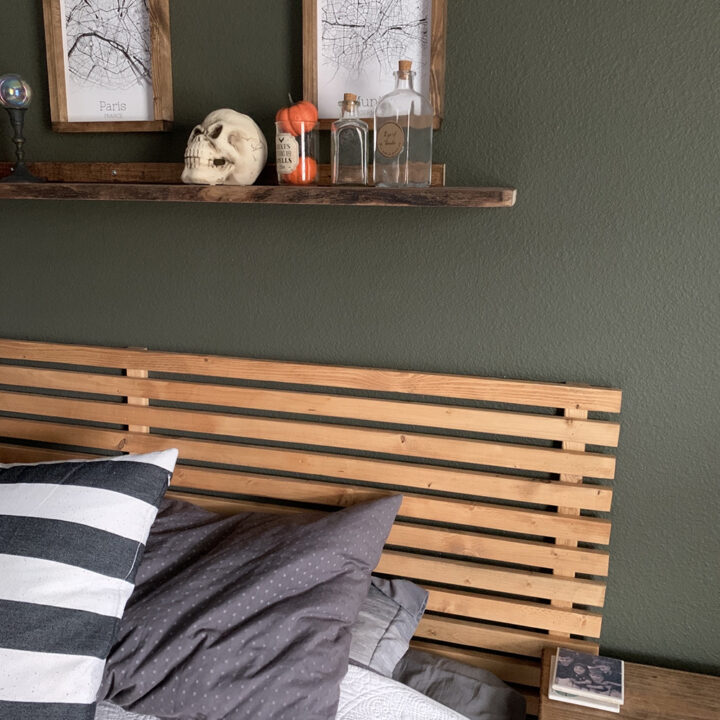
If you are like me and want a new headboard on a seriously tight budget, then I have a $40 DIY Wooden Slat Headboard tutorial for you. I purchased all of the supplies at my local hardware store and then used some tools I already owned.
Building DIY furniture is fun and rewarding. It is also a great way to save money while still having a home you love.

Tools Needed for DIY Wooden Slat Headboard
- Brad Nailer
- Carpenter Square
- Miter Saw (see Building Notes if you don’t have one)


Supplies Needed for DIY Wooden Slat Headboard
- (15) 1x2x8 Furring Strip
- Wood Stain (color of your choice)
- 1-1/4″ Brad Nails
*Building Notes
Here are a few helpful notes for building your DIY wooden slat headboard.
- If you do not have access to a miter saw you can determine your measurements before you shop. Both Lowes and Home Depot will cut the wood at no cost.
- Measure your bed width (optional: add 12 inches) for your headboard width. Measure from the floor to the desired height of your headboard for the height.
- For consistent, even space between your strips use a scrap strip of wood on its side between strips.
- To make the process of gluing and brad nailing the width strips easier, use a measuring tape and measure and mark the center of each one with a pencil. Now when you lay them out you know exactly where the center is to attach to the center support (height) piece.
DIY Process in Pics


DIY Wooden Slat Headboard
Prep Time:
1 hour
Active Time:
30 minutes
Additional Time:
1 day
Total Time:
1 hour 30 minutes
Difficulty:
Beginner
Beginner Building project - Wooden Headboard
Materials
- (15) 1x2 Furring Strips
- Wood Stain
- 1 1/4" Brad Nails
- Wood Glue
- Measuring Tape
Tools
- Miter Saw (optional, see notes)
- Brad Nailer
- Carpenter Square
Instructions
- Cut three strips to the height measurement and eleven strips to the width measurement. Stain with wood stain and allow to dry.
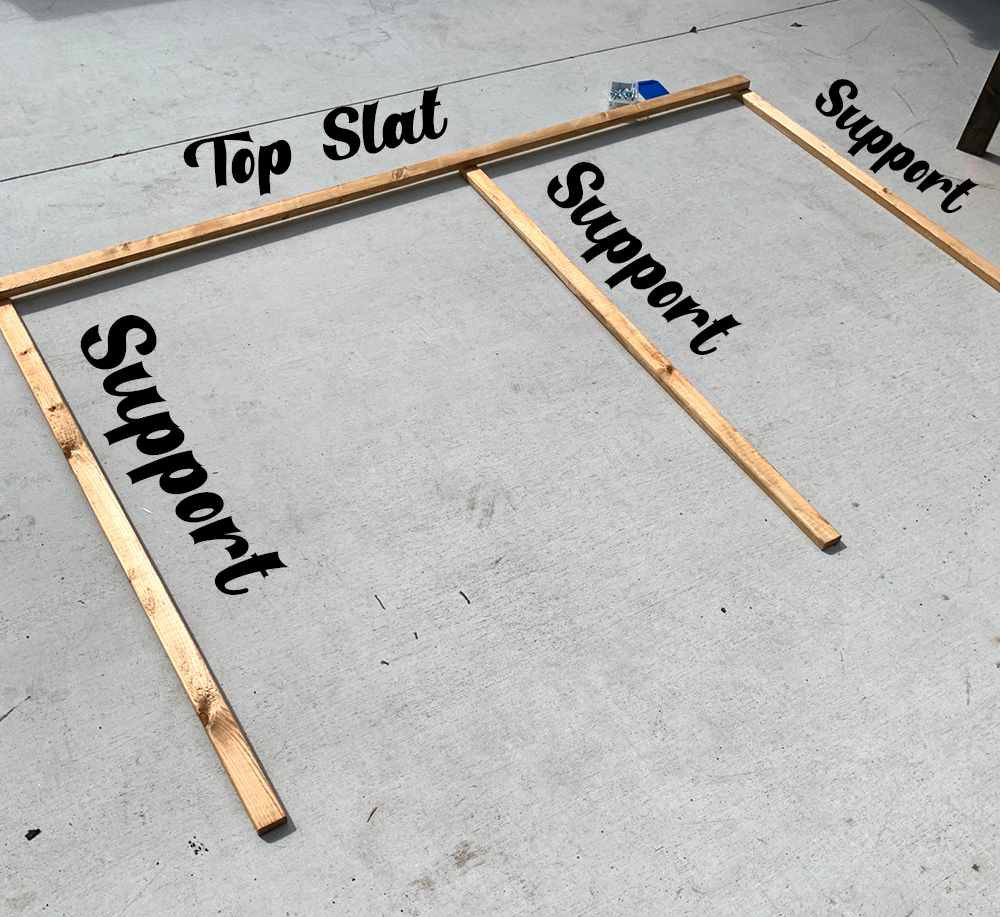
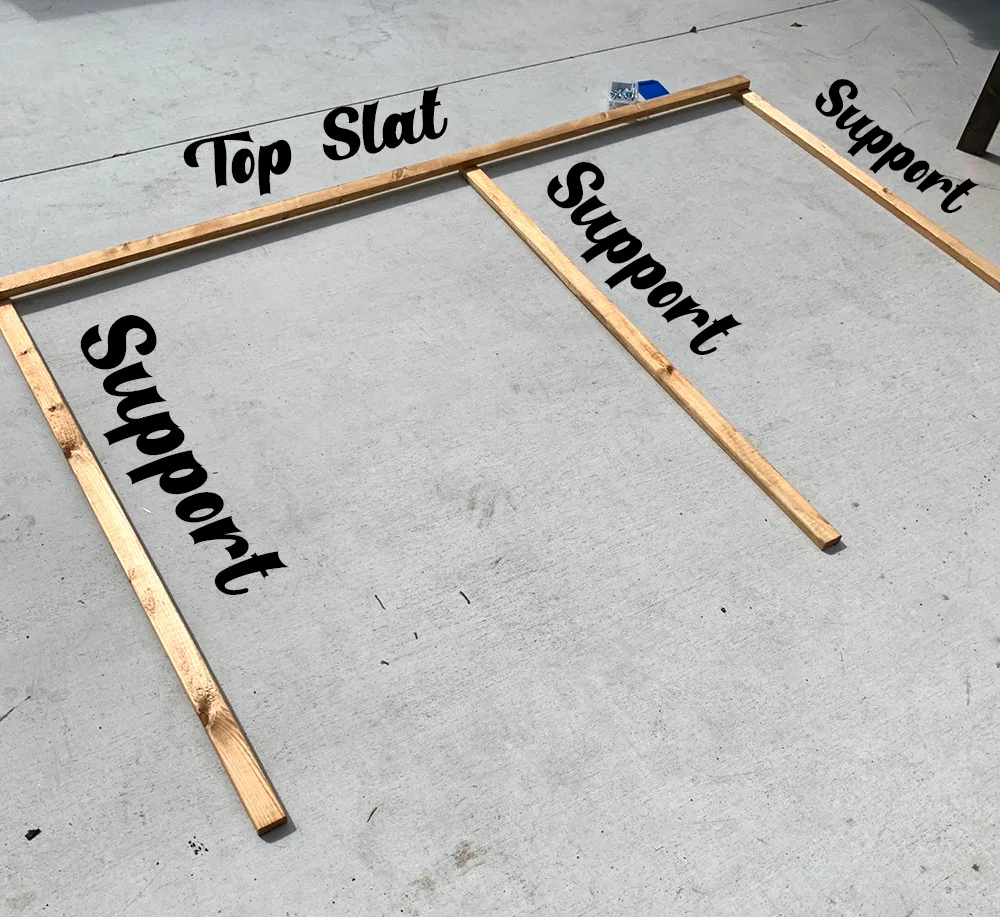
- Find a flat space to lay out your wooden slats. First set out the three shorter support pieces (cut to height). Measure to find where the two ends and center will be. *See image below
- Lay the first 'width' strip over the support pieces. Line it up with the top ends. Use a measuring tape and the carpenter's square to make sure everything is lined up properly. (This top slat is the most important because it will be your guide for the rest of the slats.) Use a dab of wood glue and then brad nail in place.
- Use a width strip (on its side) to determine spacing, line up the next strip, and glue and brad nail in place. Then remove the spacer and repeat until you have one strip left.
- Allow the wood glue to dry completely and then place the headboard behind your bed, push the bed tightly against the wall sandwiching the headboard between the bed frame and wall. Attach the headboard to the wall with screws if you prefer.
More Home DIY Projects


