These DIY Halloween ghosts are one of my favorite easy Halloween crafts! 👻

If you’re looking for a Halloween decoration that feels a little more handmade, vintage and charming than spooky, these little cheesecloth ghosts are the perfect project.
They’re inexpensive to make, require just a handful of supplies, and you can make them in different sizes to create an entire little ghost family.
And the best part? You can find the supplies I used for this project in my ShopMy collection:
ShopMy — Handmade Halloween Ghost Supplies
What You’ll Need
Here’s what I used to make my ghosts:
- Wooden round bases
- Cream gauze fabric
- Wooden dowel
- Styrofoam or foam ball
- Cheesecloth
- Black paint, black felt or black marker for the eyes
- Hot glue
- Scissors
- Drill or a small tool for making the hole in the wooden base
- Optional: jute twine or ribbon for embellishing
Shop all of my supplies here:
ShopMy Supply List
How to Make DIY Halloween Ghosts
Step 1: Prepare the wooden base
Start with a round wooden base. I used unfinished wood because I love the natural wood look with the white cheesecloth. You’ll need a hole in the center of the base for the dowel. If your wooden round doesn’t already have one, drill a hole that’s just large enough for your dowel to fit securely. You can leave the wood unfinished for a more rustic look, or paint or stain it if you want to customize your ghosts.
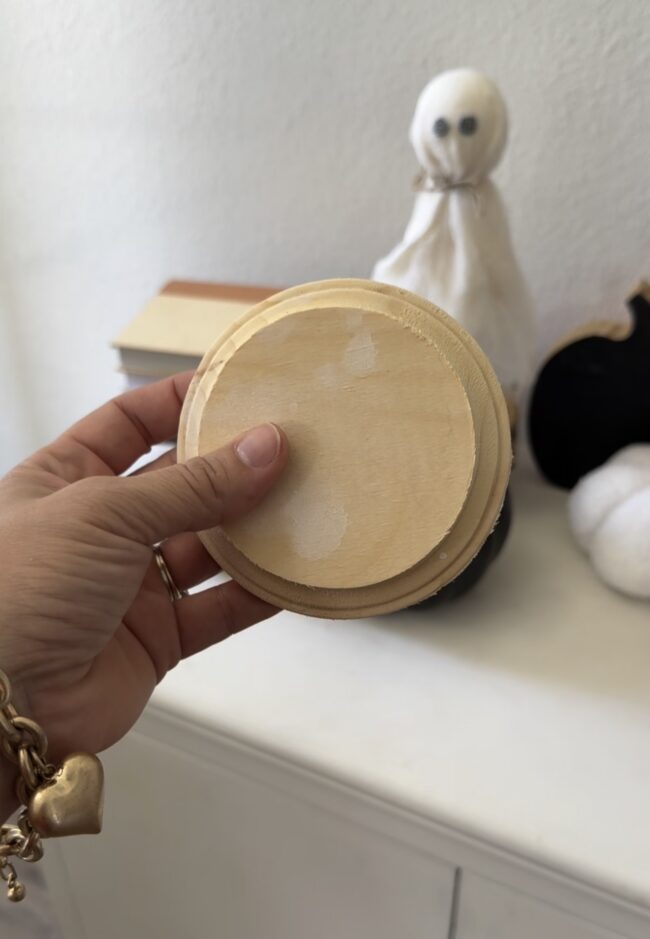
Step 2: Add the dowel
Insert the wooden dowel into the center of the base. Add a little wood glue around the bottom of the dowel if you need additional stability. The dowel is what gives your ghost its height and creates the structure underneath the cheesecloth.
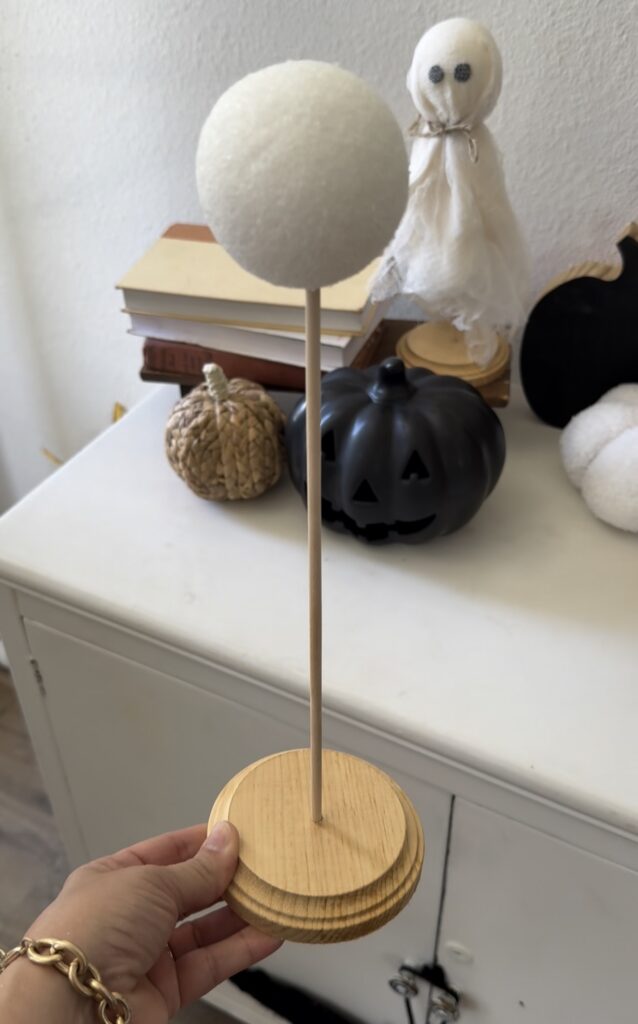
Step 3: Add the ghost’s head
Place your foam ball onto the top of the dowel. If necessary, use a little hot glue to secure it.
Tip: Make several ghosts using different-size wooden bases and foam balls. The variation in height makes them look much more interesting when displayed together.
Step 4: Drape the fabrics
Now comes the fun part! Cut a piece of gauze and piece of cheesecloth large enough to completely cover the foam ball and extend down over the wooden base. Drape the gauze over the top of the foam ball and let it naturally fall around the ghost. Don’t worry about making it perfect! In fact, the messier and more uneven the cheesecloth is, the better.
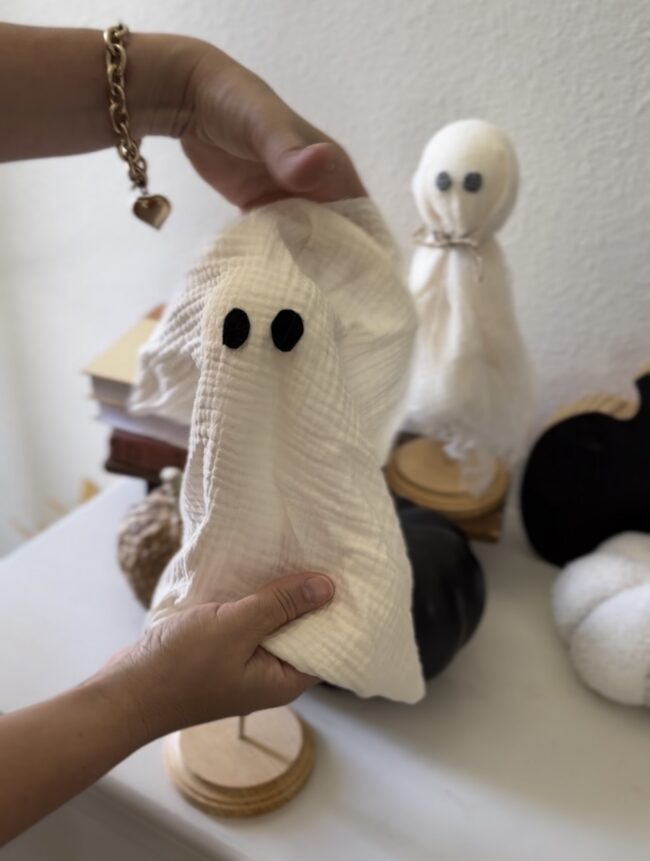
Step 5: Give your ghost some personality
Once the gauze is positioned, add two little eyes. I used black felt or the eyes, but you could customize these however you want. For a more vintage look, keep the eyes small and simple. For a slightly spookier ghost, make them larger and darker. Then drape the cheesecloth over the top of the gauze and felt eyes.
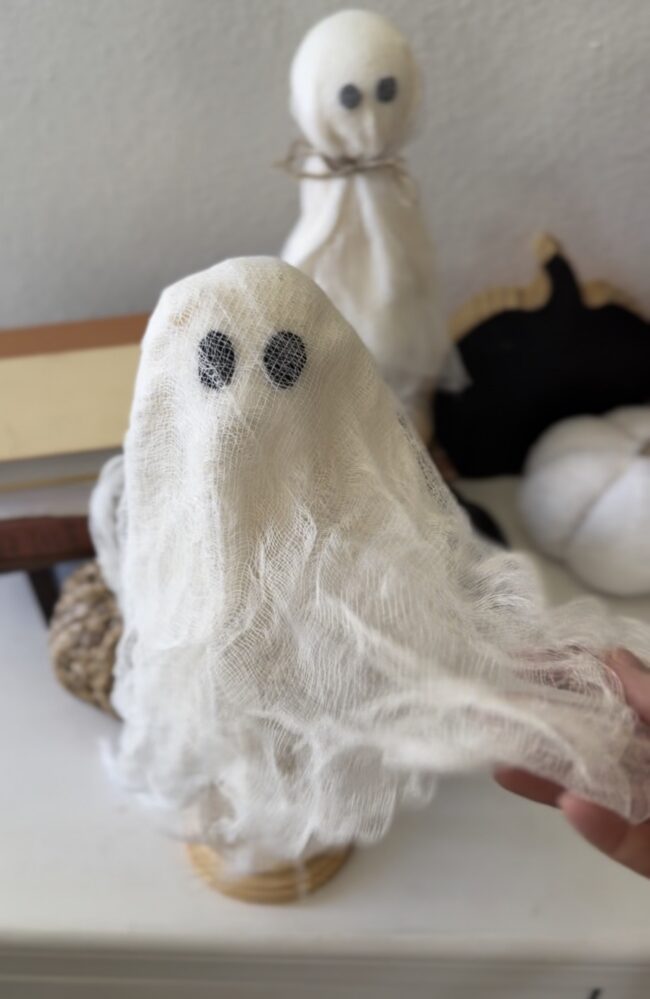
Step 6: Add finishing touches
This is where you can really make these ghosts your own. For mine, I added a little twine around the neck area. This secures the fabrics in place. You could also add a tiny bow, a piece of vintage ribbon, a little rusty bell, black or brown twine, a small Halloween embellishment or leave them completely plain for a simple, primitive look.
Make a Whole Ghost Family 👻
One of my favorite things about this project is how cute these look when you make three or more together.
Try making:
A little ghost:
Short dowel + smaller foam ball
A medium ghost:
Medium dowel + standard foam ball
A tall ghost:
Longer dowel + larger foam ball
Then arrange them together on a shelf, mantel, entryway table or kitchen counter.
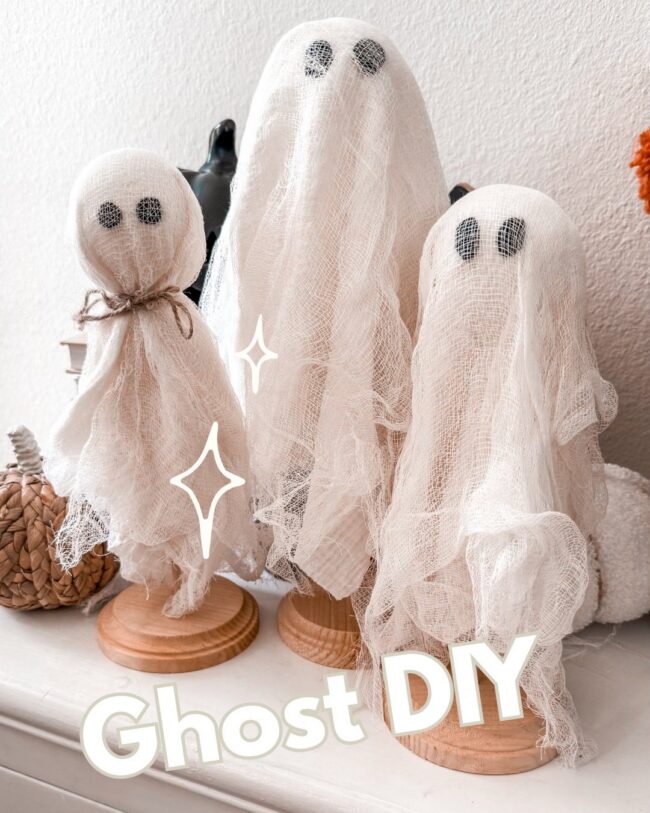
How to Get the Wispy Ghost Look
The secret to making these look more like old-fashioned Halloween ghosts instead of simply covering a ball with fabric is the cheesecloth.
Before you’re finished, gently pull apart sections of the cheesecloth to create loose fibers and uneven edges.
You can also cut small sections along the bottom and pull the fabric apart with your fingers.
Don’t overthink it! The imperfections are what give these ghosts their charm.
Where to Get the Supplies
I’ve put together a ShopMy collection with the supplies needed to make these ghosts, so you don’t have to hunt everything down yourself.
👉 Shop the Handmade Halloween Ghost Supplies
I love projects like this because they’re inexpensive, easy enough to make in an afternoon, and they create something that looks completely different from the mass-produced Halloween decorations you’ll find in stores.
And once Halloween is over, you can pack them away and bring them back out year after year!