
In this post I’m sharing a hair bow tutorial, bow template cut file and PDF so you can make faux leather bows too. Faux leather bows are easy to make and with faux leather popping up in more and more prints I can’t stop making them! Keep reading for the full tutorial.
The first time I made these bows was around Christmas to add to some decor. Then I made a few bows for my daughters mermaid birthday and I’ve made quite a few since then.
This post contains affiliate links to products I use and recommend. By making a purchase I may receive a small commission.

Faux Leather Bow Supplies
- Faux Leather from Pretty in Pink Supply (this is my favorite place)
- Bow template cut file (download at the bottom of the post)
- Scissors
- Bow Clip
- Hot glue gun
- Hot glue sticks
Faux Leather Hair Bow Tutorial Video
A time lapse video showing the process of making a faux leather hair bow. For the video I show how to use Happy Cut HTV to add a design to the faux leather.
Faux Leather Hair Bow Tutorial
Faux leather hair bow tutorial.
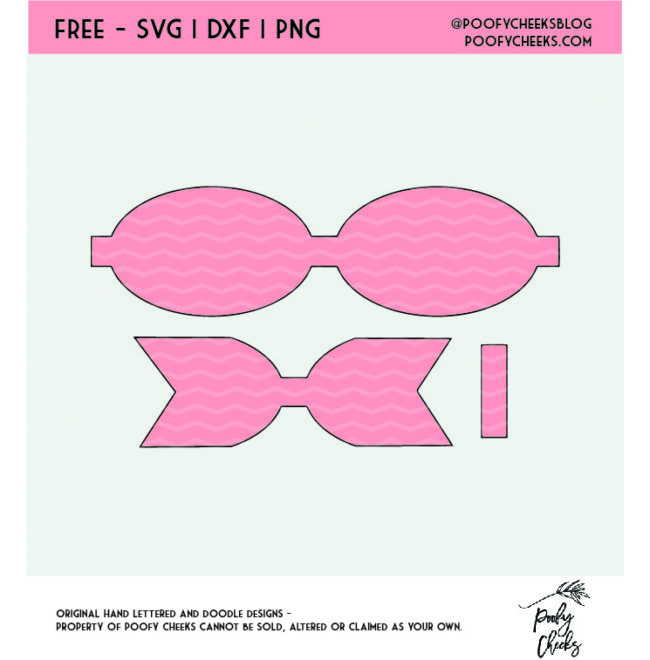
- Download the template.
At the bottom of the post enter your email and name to have the ZIP folder instantly sent to your email. The folder will include a PDF, PNG, SVG and DXF bow template.
- Cut the pieces for the bow.
Print the PDF template and cut the faux leather with scissors OR use your Silhouette or Cricut cutting machine to cut the faux leather pieces for the bow.
- Glue pieces together.
Glue the bow pieces together using a hot glue gun. To see where to glue and attach pieces watch the video above.
- Attach the bow to a clip, headband or use it as an embellishment.
There are so many ways to use these bows! Attach a clip, use it as an embellishment on a larger craft, attach it to a headband or come up with your own unique idea! Pretty in Pink Supply has lots of different clip and headband supplies you can use!

Happy Cut Heat Transfer Vinyl
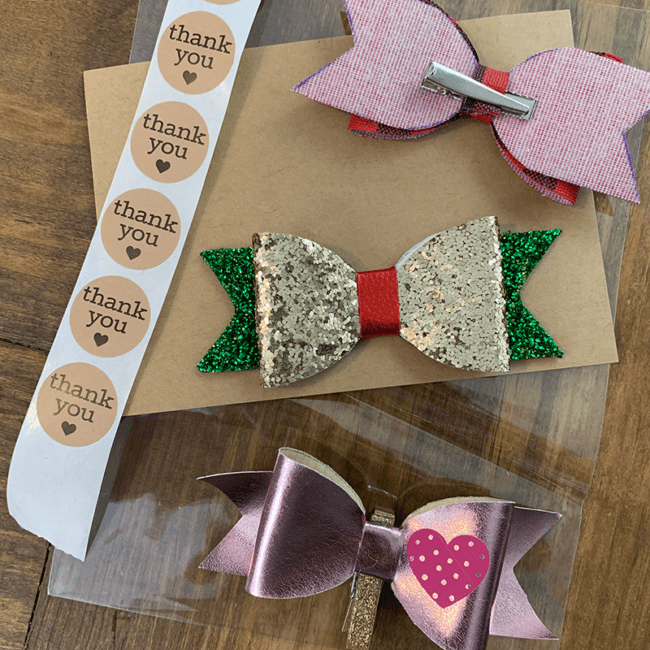
For the pink bow with the heart I used Happy Cut HTV. Happy Cut is a Happy Crafters heat transfer vinyl that requires lower heat and pressing time.
As many of you know I usually use a heat press but to show how easy Happy Cut is to use I applied it using a home iron on the highest heat setting with no steam. Watch the video I have above to see it in action!


When I made and sold these bows I packaged them by cutting a piece of Kraft cardstick and putting it in a lip and tape cello bag. Then I finished it with a Thank You sticker.
More Bow Tutorials
Find more hair bow tutorials on PoofyCheeks.com


Download Bow Cut File and PDF
Enter your email and name below to have the ZIP folder sent immediately to your inbox. The ZIP folder contains SVG, PDF, PNG and DXF files.

Amrita Rastogi
Thursday 24th of February 2022
Please send me pdf file format for now making. Thanks much in advance.
Robyn Lindsey
Friday 5th of November 2021
Hi :) I’m looking to receive the svg downloads
Aleida Dennison
Wednesday 6th of October 2021
thank you
Mehwish Saba
Monday 7th of June 2021
Hi, i want that bow tamplete... Kindly send me
Oks
Sunday 24th of January 2021
Hi. Can I get it? Thanks