Yesterday I shared 9 FREE Social Media Icon Sets and today I am sharing how to create the HTML code to go along with them. It might seem hard but I am going to break it down to make it as easy as possible. Once you have your social media icon images picked out you will need to upload them to a place on the web such as Photo Bucket or Picasa and plug the image code and URL links in. Ready? ![]()
Now that you have the base code we need to find out what your image links and social media URLs are so we can plug them in. Step #1: Save the images you want to use to your computer if you haven’t already done so. If you are using my FREE icons then you can pick the images you need for each platform. For this tutorial I am going to use the aqua watercolor icons to create buttons for my Facebook and email. Below is a screenshot from my icons in Google Docs. At the end of the file name it shows which social media platform the image is for. To the right of the file name there is a little arrow you click and then pick download. You will get a message asking if you want to open or save – click on save.  2. When you save the image(s) PLEASE for the love of Christmas save it somewhere you will remember! I don’t know how many times I have had people who can’t seem to figure this out because they don’t remember where they saved their images. Take note of where you are saving and press ‘save’
 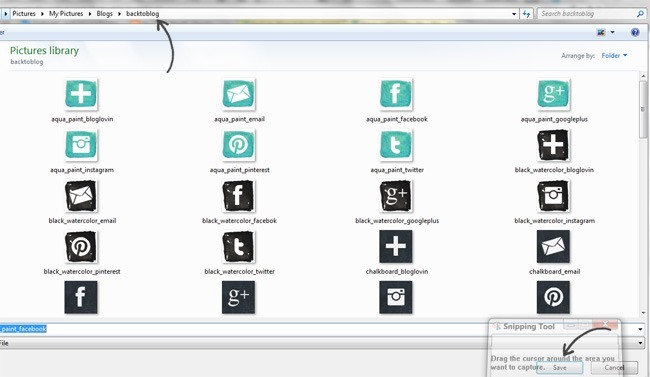 3. Now you want to upload your images to the web. I am going to use Photo Bucket for this but if you have a place of preference then please use what you are familiar with! (Please tell me you still remember where you saved them!)
 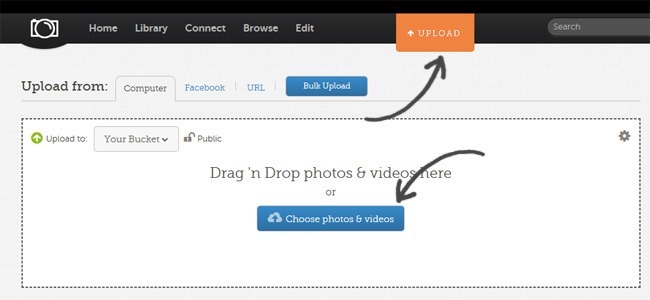 4. Once you upload your image(s) you need to get the direct link to your uploaded image. In Photo Bucket if you click on the image four links come up on the right sidebar. Copy the code in the direct box (where the arrow is pointing). Now I have my direct image link for facebook so I can plug that in on Notepad where it says directimagelinkhere.jpg .
 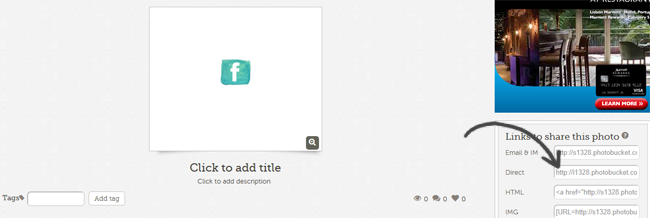 5. Okay now that we know where to find your image codes you also need to know all of the URLs for the platforms you want to link to. You can see my facebook page URL below. (I like to open a new tab for all of my social media accounts when I am writing this code so I can quickly copy/paste everything.) Plug your URL into notepad where it says http://www.facebook.com/YourPageHere
  6. Repeat steps 4 and 5 for all of the social media platforms you want buttons for EXCEPT for your email. For your email copy and paste the code in the gray box below. Instead of adding a URL you want to put your email address, so for me mailto:[email protected] would be mailto:[email protected] . (However adding the direct image link to your email icon will still be the same.)
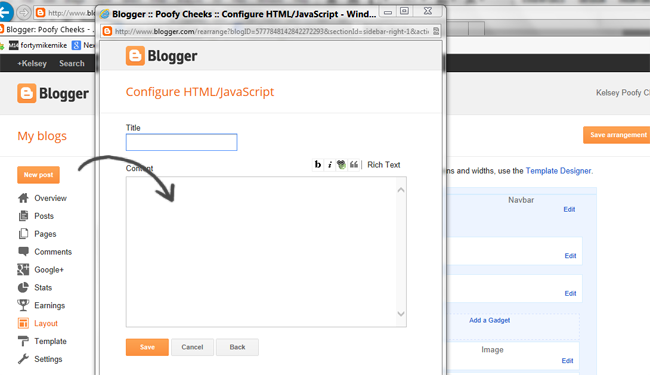
7. Now that you have the code part down we need to add it to your blog. Open up Blogger and go to Layout. Then click on Add Gadget. When the different gadgets pop up choose HTML/JavaScript. 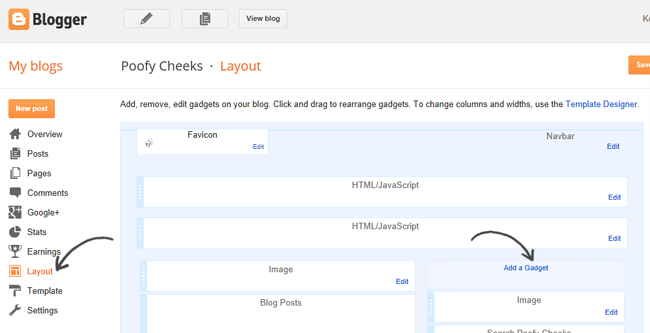 8. This window will pop up and you want to copy all of the code from Notepad and paste it into the content section and press save. You might want to arrange your new gadget to a different place on your sidebar but now is the moment of truth when you go to your blog homepage and see if everything looks right!
  My final code looks like this when I plug in my URLs and direct image codes –
When copy/pasted into the HTML/JavaScript widget it will look and work like this- 
 If your buttons don’t look right or work correctly and you are not sure why then please do not hesitate to ask me! I would be more than happy to look over your code! If you are still like WHA!? this is not in English then stop by the Blog School Facebook roup and see if myself or another member of the group can work with you to figure it out! ot tnaw uoy fI Enjoy,


 I party HERE

Frank Robinson
Tuesday 16th of February 2016
Hello, great article, besides if you don't have enough of time to create some icons by your own you can just download them on http://www.cannypic.com/ you can find there a lot of great stock photos, images and icons for your website or blog.
anna
Friday 7th of November 2014
Hello!Whenever I click on my social media icon, it just adds the social media link to my blog website like this...
http://theadertons.blogspot.com/"https://www.facebook.com/anna.aderton"
any ideas?
Marie
Thursday 6th of November 2014
Hi Kelsey,
Thank you for this easy tutorial! Is there a way to change the size of the icons?
Arti Arte
Thursday 2nd of October 2014
do you have a social icon for tumblr
Ickynicks J
Monday 1st of September 2014
Thank you so much! I have attempted to type in the HTML code several times into the blogger gadget, however I knew something was wrong because it would not work. I read several other blogs and I had no luck. After reading yours and doing it a third time, it worked!
poofycheeks
Wednesday 3rd of September 2014
So glad it helped!! :)