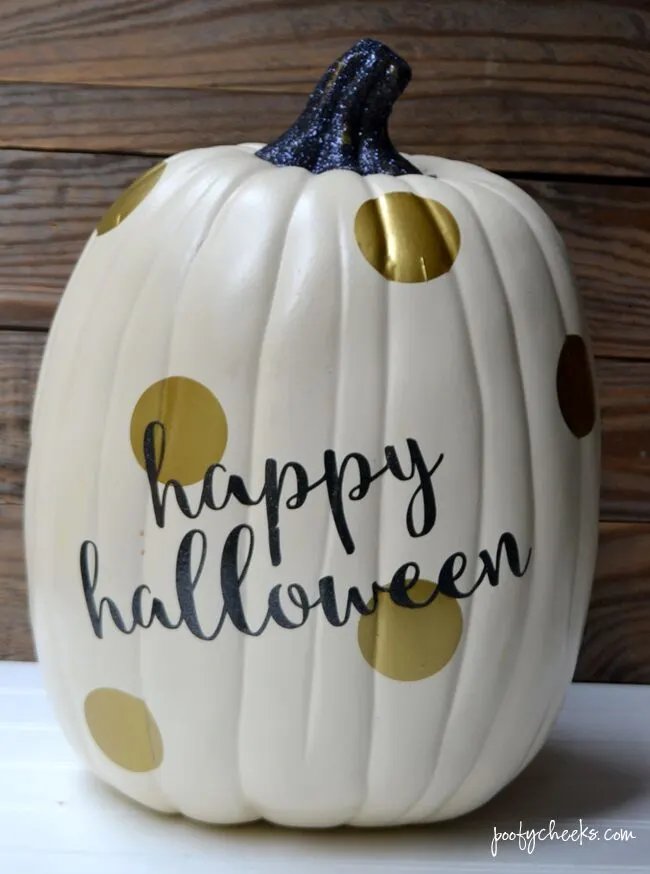
It is officially September which means I can post all of the Halloween tutorials I want and not feel one bit guilty! Pumpkin everything is happening here. I have been in full Halloween crafting mode for the past few weeks.
Last week I was at Walmart when I came across a center bin full of craft pumpkins. I couldn’t resist the temptation so I snagged one and put it in my cart. I knew exactly what I was going to make with it.
I saw the prettiest glam halloween pumpkin at Hobby Lobby but when I looked at the price it was $40! It was a cream colored pumpkin with gold stripes and black writing that said ‘Happy Harvest.’ Even with a 40% off coupon I thought the price was too high (yes, I am cheap and I know it). Then when I saw the white pumpkin in Walmart the light bulb went off and I knew it was meant to be.


Glam Halloween Pumpkin Supplies:
- fake pumpkin
- glitter
- Mod Podge
- paint brush
- shiny gold vinyl
- black glitter vinyl
- Silhouette Cameo
- vinyl transfer tape

I started by cutting out the vinyl using my Silhouette. I cut 1.75 inch circles from the metallic gold vinyl and ‘happy halloween’ from the black glitter vinyl. (I used Berrylicious font).

I painted the stem with Mod Podge and then dusted it with black glitter. This instantly changed the entire look of the pumpkin.

Adhere the gold circles to the pumpkin. I slowly applied the circles rubbing the vinyl into any lines of the pumpkin as I went to keep the circles smooth. After I liked the way the polka dots were placed around the pumpkin I used vinyl transfer tape to stick the black glitter vinyl to the middle of the pumpkin.

The price tag on my pumpkin was close to $14 including the black glitter I bought on clearance at Michael’s!


Sarah Wilson
Friday 18th of September 2020
Love this! I’ve been planning to do a monogram pumpkin for my 4 month old daughter And one for her 5 month old cousin! I was worried about the ridges of the fake pumpkin but it seems like you had no issues. 😊
Falon
Sunday 6th of September 2015
This is so cute! I can't believe we are making Halloween projects already! Thanks for sharing :o)
happy new years images
Friday 4th of September 2015
Good idea. Thank you.