
I am BEYOND excited to share this Snow Globe Tumbler tutorial. I used to love making glitter epoxy cups but I was having a reaction to the chemicals in the 2 part epoxy and had to stop. That didn’t stop my love for glittery drinkware.
Now I have found a safer, quicker and easier way to make glitter tumblers. I think you are going to fall in love with these DIY glitter snow globe tumblers as much as I have.

The added bonus today is that I teamed up with my Team Creative Craft friends to bring you not only one Valentine inspired crafts but 16! See what they made at the bottom of this post.
Glitter Epoxy Tumbler Supplies
You are going to need to gather a few supplies to create these snow globe tumblers. Chances are you might already have some in your craft stash.
- Drill
- Drill bit (I have used anywhere from a 15/64 to a 3/8 sized drill bit)
- Double wall acrylic tumbler (Read details below)
- Glitters of your choice
- Polymer clay slices
- Vegetable Glycerinhttps://amzn.to/3KOeq1F
- Water
- Pipette
- Clear Shipping Tape
- UV Resin
- UV light or SUNLIGHT
Drill Bit Details:
We have used larger and smaller drill bits and found the smaller the better. You want to go slow when trying to drill through the outside layer of the cup so you don’t crack it or get too crazy and start going through the second layer too. We broke the outside edge of our first cup this week and it was a sad waste of $7.
When I can, I use the 15/64″ drill bit because it is the perfect size to get the glitters down into the cup. If I am using polymer clay sprinkles then I go with the 3/8″ drill bit because of the larger sprinkle sizes.
The Acrylic Cup
Obviously the most important part fo the snow globe tumbler is the tumbler itself. I have used the Starbucks double wall tumblers and I also tried one from Michaels. I have no complaints about the Starbucks tumblers except for they are hard to find.
Michaels had some new double wall tumblers and I picked two up the other day. One broke while drilling the hole and the other came out fine. My complaint with that tumbler is that where the acrylic meets at the top was really skinny and the glitter stuck up in there to never come down. Picture below.
I have a preorder on a predrilled tumbler from Peach Tree Market Co coming (sold out already GAH) and am interested in trying these double wall tumblers on Amazon next.


Glitters and Polymers for Inside the Snow Globe Tumbler
This is the fun part. Each tumbler is always so different and unique based on the glitters and polymer sprinkles you fill it with. My daughter and I have made tumblers with a combination of glitters and polymers and others with only glitters.
I suggest using different size glitters for a really unique look. The way the glitters float through the cup almost reminds me of a lava lamp. We have noticed that the smaller the glitter (fine glitters) clump up more so take note of that if you don’t want that look. I think they all look amazing regardless!
Our favorite place to buy glitter is Lilly’s Glitter Shoppe and we have ordered from their ETSY shop many times. Quick shipping! We also pick glitter up at our local craft stores when we are in a hurry.
Filling the Snow Globe Tumbler with Liquid
We are currently using a mix of 50/50 vegetable glycerin and water inside our tumblers. I posted one of my tumblers on Insta a few weeks ago and I got questions about why I didn’t use glue. Honestly I didn’t do much research the first time I made a snow globe tumbler so I didn’t even know using glue was an option.
Since recieving that comment I have done a LOT more research and I’m still sold on the fact glycerin/water is the best mix. I watched a few videos comparing baby oil and water, glycerin and water, glue and water and contact solution. The clear winner was the glycerin/water while the glue/water mixture created a lot of bubbles almost like soap.
I’ve found that mixing the water and glycerin first and then using a pippette to put them into the cup makes sure the mixture is correct every time. I tried eyeballing it and it didn’t turn out so great.
Gettting Out Air Bubbles before Sealing the Hole
Now that we have this big hole on the bottom of the tumbler we need to seal it, but first we need to make sure we get out as many of the air bubles as possible. When I made my first tumbler I was impatient (and didn’t know better) but sealed it before letting it sit to get the air out.
It didn’t turn out that bad because I didn’t use fine glitters, but as I started using fine glitters in my tumblers I noticed the air bubbles cause an issue with clumping and glitter getting stuck at the top of the tumbler. Now I fill them slower, filling them completely and let them sit upside down overnight. I come back in the morning and use the pipette to fill up completely again.
After that I use clear shipping tape to place over the hole and shake it, move it, roll it to try to get any other air bubbles stuck to come out. I even let it sit on it’s side so any smaller bubbles will gather together to make a larger one that easily pops to the top when turned.
Sealing the Hole
To seal the hole you want to cut a peice of clear shipping tape into a circle a little larger than the hole. Place it over the hole and then use UV resin all over the top and edges of the tape. You can use a UV light or place your cup in the sunlight for a few minutes until it has cured. Now your cup is done and ready. Go shake it like a salt shaker!
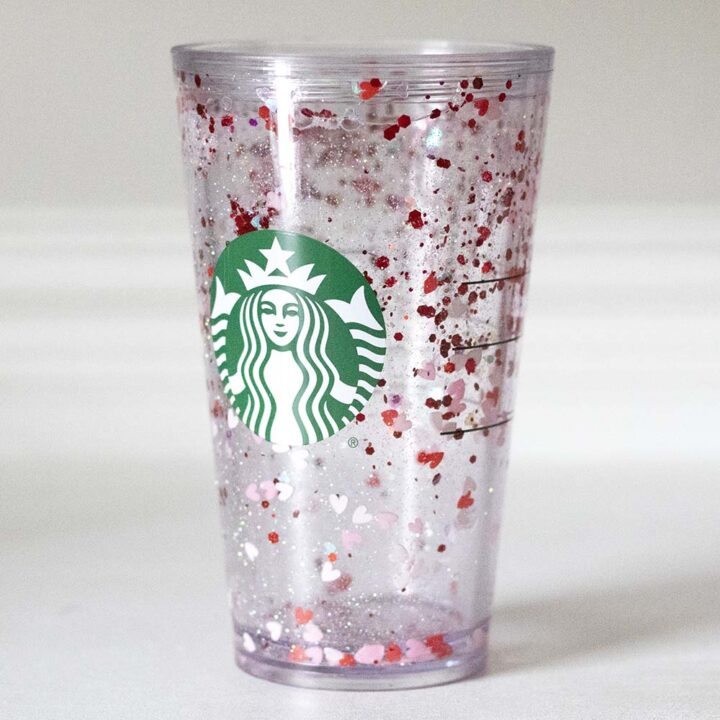
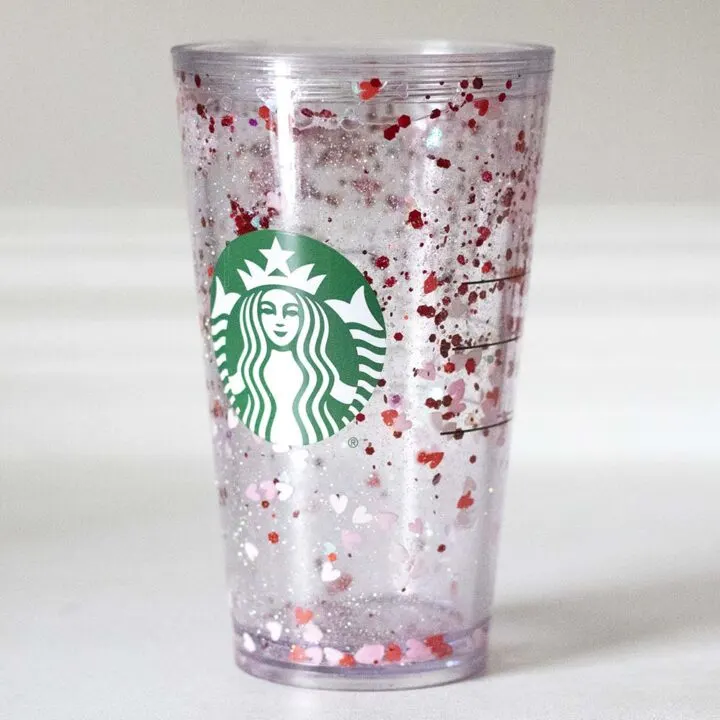
Glitter Snow Globe Tumbler
Fun and easy glitter snow globe tumbler.
Materials
- Acrylic Double Wall Tumbler
- Glitter
- Polymer Sprinkles
- Pipette
- Vegetable Glycerin
- Water
- UV Resin
- UV Resin Light
Tools
- Weeding Hook
- Drill
- Drill Bit
Instructions
- Use a drill bit to gently drill a hole into the bottom of the tumbler.
- Fill the cup with glitters and polymer sprinkles.
- Once you have your glitter mixture in the tumbler mix a 50/50 mixture of glycerin and water and then use a pipette to fill the tumbler.
- Set the cup bottom side up and allow a few hours for the air bubbles to rise to the top of the cup. You may need to turn it and shake it to help them rise. Fill up any remaining space with the glycerin/water mixture.
- Use a peice of clear shipping tape to seal the hole.
- Apply UV resin over the shipping tape and allow it to sit in the sun or under a UV lamp until it has cured.
More Last Minute Valentine’s Day Crafts …


- Laura from Me and My INKlings is sharing a Free Printable for Valentine’s Day Snowman Soup along with the recipe
- Lindsay from Artsy Fartsy Mama has a fun and flirty set of Chocolate is My Valentine Cupcake Toppers to download for free
- Laura from Laura’s Crafty Life has created a Farmhouse Style Love Sign with supplies from Dollar Tree
- Smitha from Smiling Colors is sharing an Organic Heart Pattern Journal Page that she water colored with Tombow
- Shani from Sunshine and Munchkins has created a Free Printable Valentine’s Day Joke Decoding Activity
- Justine from Little Dove has created Heart Shaped Bath Bombs with a surprise inside plus a Free Printable Tag for Gifting
- Erica from Five Little Monsters is sharing the sweetest Heart Shaped Crocheted Treat Bag including the complete pattern
Faux Leather Valentine Heart Earrings - Simply Made Fun
Saturday 26th of February 2022
[…] Kelsey from Poofy Cheeks has the full step-by-step tutorial for a DIY Snow Globe Tumbler and we are … […]
Justine Young
Friday 4th of February 2022
Oh my goodness, this is such a cute idea! I love that you can personalize it with any color/theme you want!
heart bath bombs with a surprise inside - Little Dove Blog
Thursday 3rd of February 2022
[…] Kelsey from Poofy Cheeks has the full step-by-step tutorial for a DIY Snow Globe Tumbler and we are … […]