
This is the time of year when I get extra passionate about helping others improve their small business. The holiday season is upon us and sales will be at an all time high. Today I am giving you all of my tips for taking natural light product photography with Cricut made backgrounds.
No matter what type of business you are running, having a Cricut machine is a way to level up on everything from product photography to packaging.

Find Your Natural Light Location
The first step to great natural light product photography is finding your light source and the best time of day. In my craft room there are two windows and where the light meets is the best place for photos. The light coming from two different directions nearly eliminates shadows when I photograph mid-morning.
As the sun goes to the other side of the house in late afternoon and evening the shadows become more harsh.


In our new house (we have been here for under a week) there is an abundance of natural light that pours in from one direction. That is probably why I fell in love with the house immediatly. I scouted out the lighting yesterday to show you my new natural light photography spots.


The photo above is our formal dining room (north facing) and the big windows let massive amounts of light in from one direction. Setting up for photos on the dining table facing the windows or even at a slight angle is the perfect spot for natural light.
Then in our new office/craft area (facing east) we have another full wall of windows with great natural light pouring in from sunrise until late morning.


If you don’t have an abundance of natural light in your home heading outside on an overcast day is the next best thing. Some people think that full sun would make for great natural light photos but that creates harsh light. Taking photos outside in the shade can cast a blue tint to your photos. Finding your perfect spot will take some experimenting, but finding the best natural light will completely change your product photography.


Above is the original photo I took, below is after I cropped and bumped up the brightness and contrast.


Product Photography Backgrounds
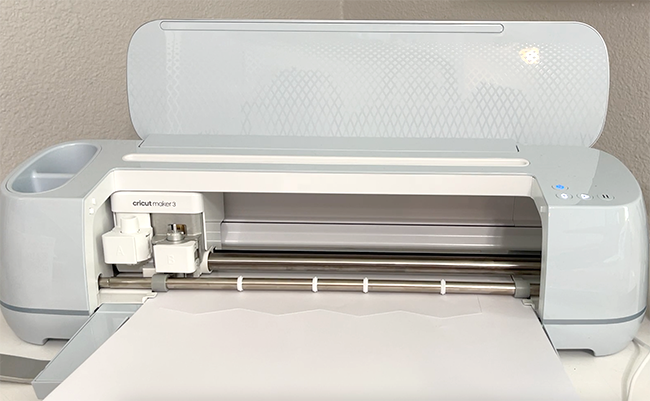
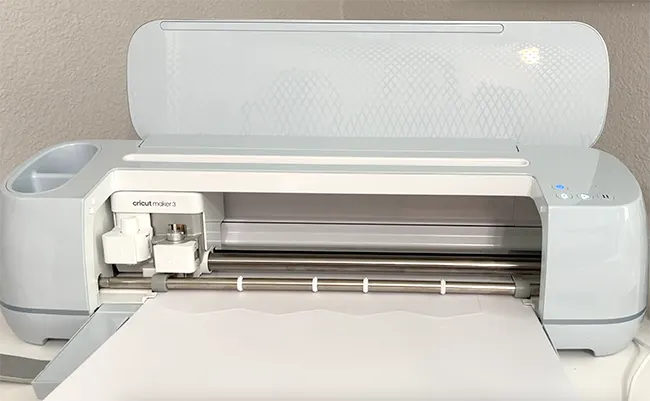
I always suggest using a neutral background for your main product listings. After years of selling my products online white backgrounds have always performed the best. I’m going to show you how I used my Cricut Maker 3 to create an interesting yet neutral background.


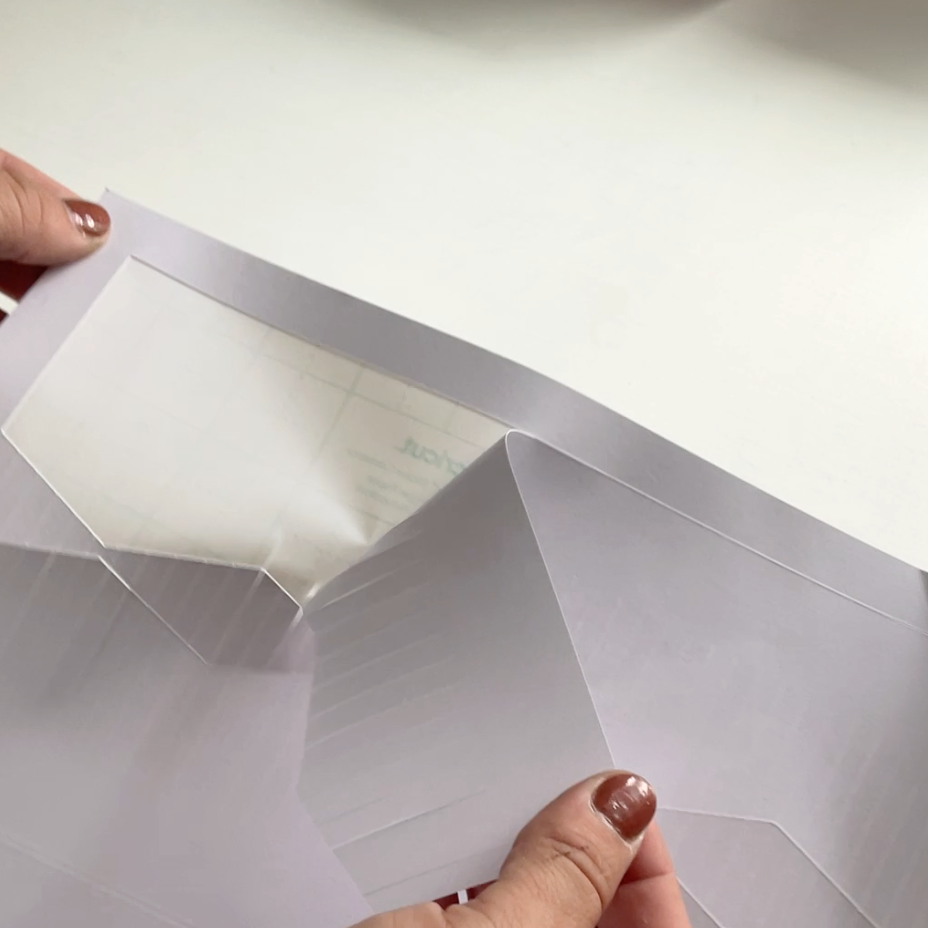
I used my Cricut Machine to create a fringed background using the new Cricut Smart Paper™ Sticker Cardstock. I created a chevron fringed cut file (download it for free below) and cut and layered the paper in an overlapping fashion on the side of a box.
Sidenote: Boxes are great for creating custom backgrounds.


From afar this setup may look a little sloppy. I have my fringed cardstock on the box as the background, a white poster board underneath and my product (mini Halloween house) ready to take photos.


A quick photo using natural light using a camera or a smart phone, possibly a few photo edits to bump up the brightness or contrast results in the perfect product photo of this little house. This is a great way to add some interest and depth to your product photos without distracting from the product itself.
I am so tempted to use the pastel Smart Paper Sticker Cardstock to try this fringed background as a photo booth backdrop!


How to Make a Fringed Background with Cricut
Use a Cricut cutting machine to create a fringed photo backdrop.
Materials
- Cricut Maker 3
- Cricut Smart Paper Sticker Cardstock
- Cricut Fine Point Blade
- Box
- Poster board
Instructions
- Download the free fringe cut file and open the SVG file in Cricut Design Space
- Select the entire design and press 'Attach' and then 'Duplicate' in Cricut Design Space

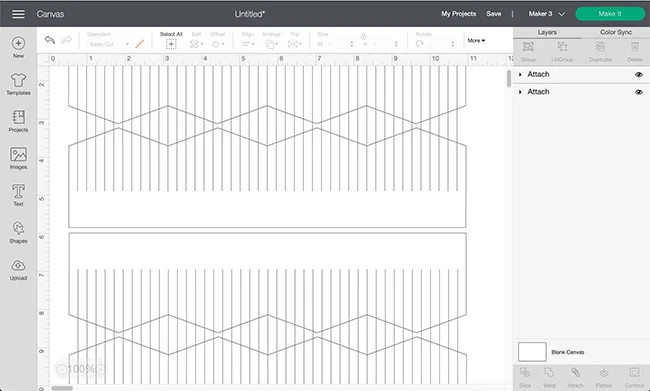
- Select and resize the fringe designs to be around 11 inches wide. Press 'Make It'
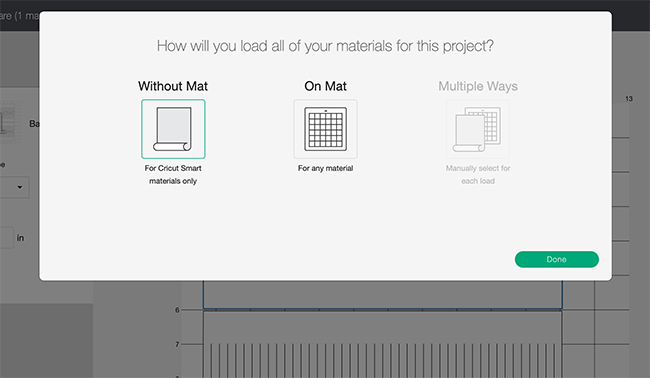
- Select 'Without Mat' for Cricut Smart Materials

- Set your base material to Smart Paper Sticker Cardstock
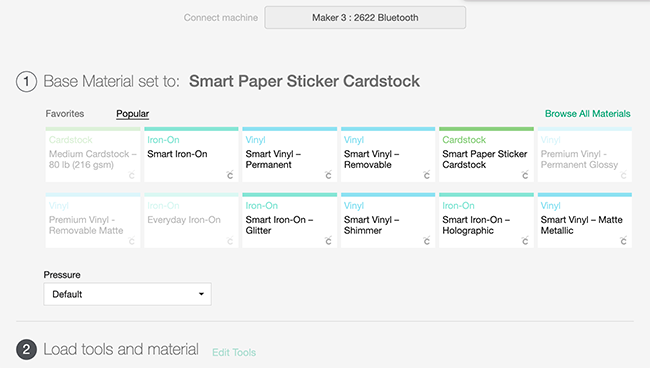
- Follow the prompts on screen to load your fine point blade and sticker cardstock and press GO
- When your sticker cardstock is done cutting, remove it from your Cricut machine, peel and stick onto a box slightly overlapping as you go.

More Product Photography Tips
When taking and uploading product photos to sell online it is important to:
- Get pictures of every angle since the buyer can’t touch and feel
- Take photos with a clean background but also with the product in use
- Use natural light whenever possible
- Find a way to represent the actual size of the product through photos


Even with natural light photography it can be hard to get rid of shadows. Using a peice of white poster board or a photography reflector to reflect light back helps eliminate the shadows.