
I am showing you how to size and put a vinyl decal on a Starbucks cold cup logo. The tutorial uses a 24oz Starbucks cold cup, but you can modify for different cup sizes by measuring the logo. For the cold cups I use permanent vinyl but always suggest hand washing.
The cold cup I am using has been coated in glitter and epoxy and is smooth and ready for vinyl. Watch my YouTube video to learn how to make a glitter tumbler.

Measuring the Logo
Measure your cold cup logo with a soft measuring tape. You can find these in the sewing section at most stores and craft stores. For this venti cold cup the logo measures 2 inches x 2 1/8 inches.


Sizing the Design in Silhouette Studio
To get the design to the correct size I start by making an oval in Silhouette Studio that measures 2×2.125 inches. Then I take the design that will go around the logo and size it to that oval.
The sun design was purchased from ETSY


Video Tutorial: Applying a Vinyl Decal to a Starbucks Cold Cup

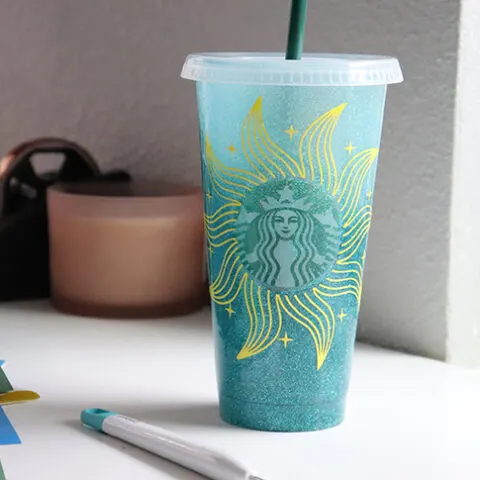
Putting a Vinyl Decal on a Starbucks Cold Cup
Materials
- Cold Cup
- Oracal 651 Vinyl
- Grid Transfer Tape
- Cut File
Tools
- Weeding Hook
- Squeegee
- Scissors
- Soft Measuring Tape
Instructions
- Measure your cold cup logo using a soft measuring tape
- Resize the design around the logo measurements in your cutting machine software
- Use your cutting machine to cut the design for your cold cup
- Weed and put the design on a clear transfer tape using a weeding hook and squeegee
- Squeegee the vinyl onto the cold cup and peel off the transfer tape


