When I had my daughter I couldn’t find a crib blanket that I liked so I sewed her a rag strip quilt with all of the colors I wanted. Again I found myself wanting a crib blanket in colors and prints I couldn’t find so I decided to sew our newest addition another rag strip quilt. This time I made two major changes to the way I cut and sewed the strips and it cut down my sewing time significantly and turned out just as nice. 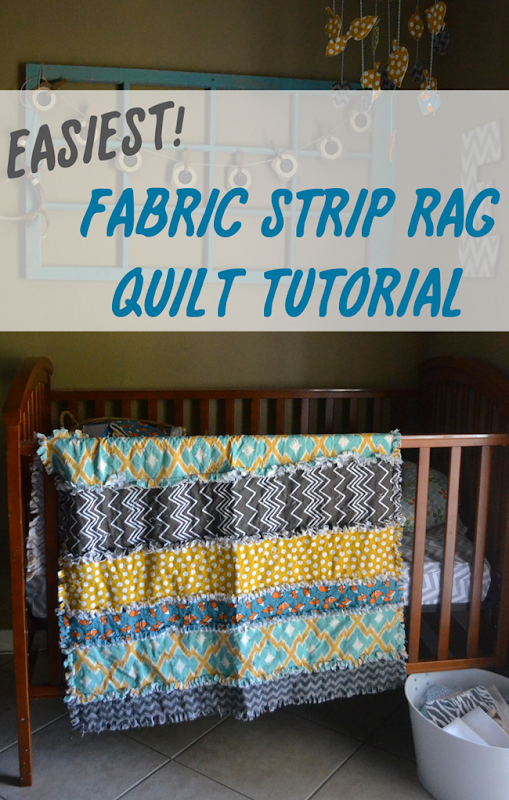
- Cotton Fabric – fabrics for the front strips of the quilt (I used 5 prints in the following sizes)
- Fabric 1 – 3/4 yard
- Fabric 2 – 1/2 yard
- Fabric 3 – 1/2 yard
- Fabric 4 – 3/4 yard
- Fabric 5 – 3/4 yard
- Flannel Fabric – fabric for the back strips of the quilt (2.5 yard cut of fabric if using the same print)
- Sewing Machine/Thread
- Scissors
- Cutting Mat
- Rotary Cutter
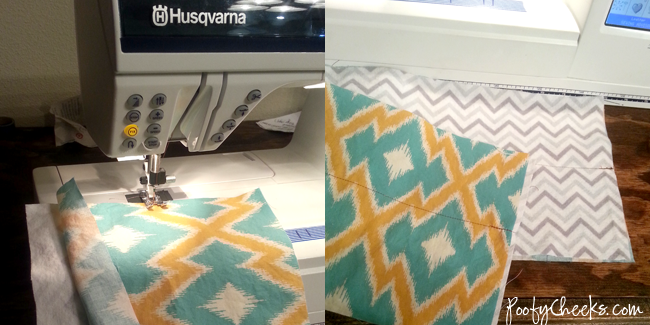
**I will warn you that I sewed this quilt late into the night so the lighting and photo quality isn’t that great for some of the steps. The first thing I did was buy and gather the fabrics I wanted and cut them into strips. Then don’t skip the important step of PREWASHING your fabric! Below is the chart I made and used for cutting my strips. For each strip you cut for the front of the quilt you must cut a flannel piece the same size for the back. I arranged and sewed my strips in the order shown in the chart. I wanted my finished quilt to be around 36×55 inches (the size of most crib blankets) but remember you need to make it quite a bit longer and a tad bit wider to compensate for the excess fabric you are going to snip to make the rag effect. **The first way I cut down on the time it took to make this quilt versus the other one was using wider strips which made less strips for me to cut and sew. 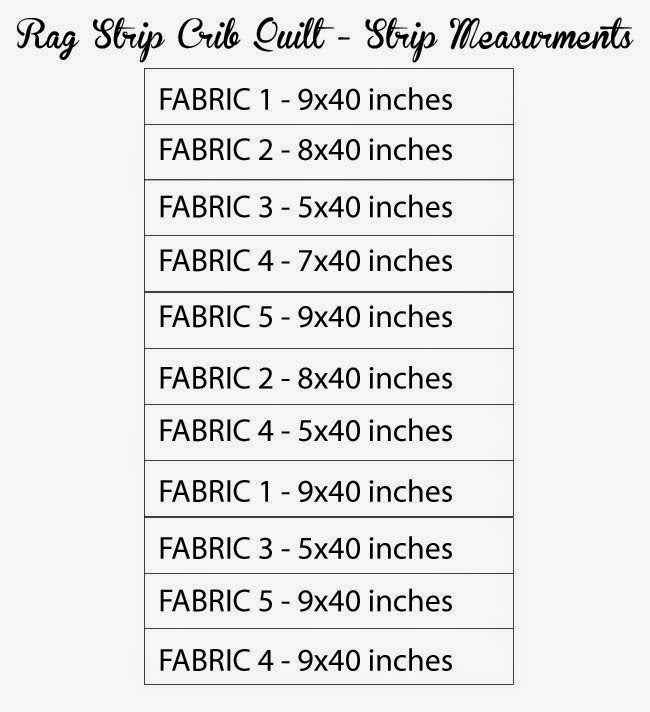 After you have prewashed your fabrics and cut them to the sizes shown it is time to start sewing! Take your piece of cotton and put it wrong-sides-together with the piece of flannel you cut to be the same size. Sew straight down the middle of the fabrics long ways . Repeat this step with all of the strips and in the end you should have eleven strips with cotton fronts and flannel backs. **The second way I saved a significant amount of time was by only sewing one stitch down the middle of the length of the strips rather than around all four edges like I did with Delilah’s quilt. This saved me SO MUCH TIME!!!
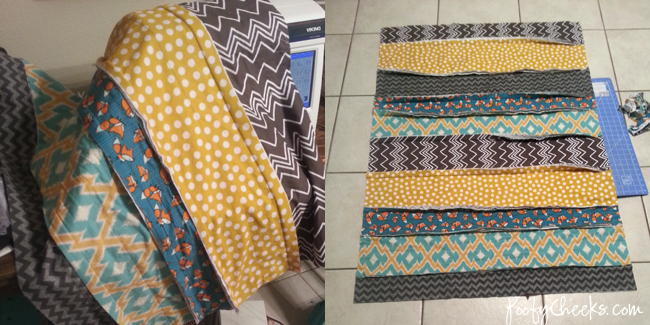
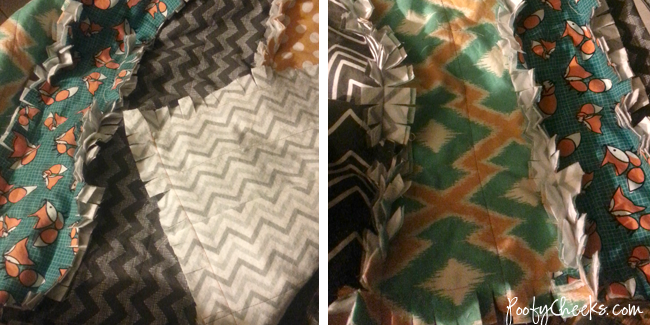
  Then it is time to start sewing your strips together. Take your first strip and put it flannel-sides-together with the second strip and sew the two together with a one inch seam allowance (or however much you want to leave and snip for the rag effect). Repeat by matching the flannel sides of strip two with three and continue until all of the strips are sewn together. The picture below on the left is after I did the first five strips – you just keep matching your strips with flannel sides together until your finished. The picture below on the right shows the quilt after all of the strips were sewn together. After I finish sewing the strips together I usually need to trim off excess from the sides of the quilt with my rotary cutter to make them even. I then sew along all four outer edges of the quilt leaving one inch which will be snipped for the rag effect.
  For the final step use scissors to snip around all four edges of the quilt being sure not to cut into the stich you just made around the quilt. Then cut all of the edges between your strips also making sure not to cut into the stich holding them together. Then wash and dry your quilt at least twice if not three times to get the rag effect. You will want to wash it alone and be sure to clean out your dryer lint trap because you will have tiny strings of fabric coming from the quilt the first few times you wash it. The more the quilt is washed the more it rags the quilt. The picture below shows the quilt after I finished snipping but had not washed it yet. I think it was around 2am at this point. Once I finished I through it in the wash and went to bed!
  **The amount of excess fabric you left for snipping (mine was one inch) and the distance between your snips will determine how the quilt rag effect will look after it is washed. The two images below show the quilt after I snipped and washed it once.
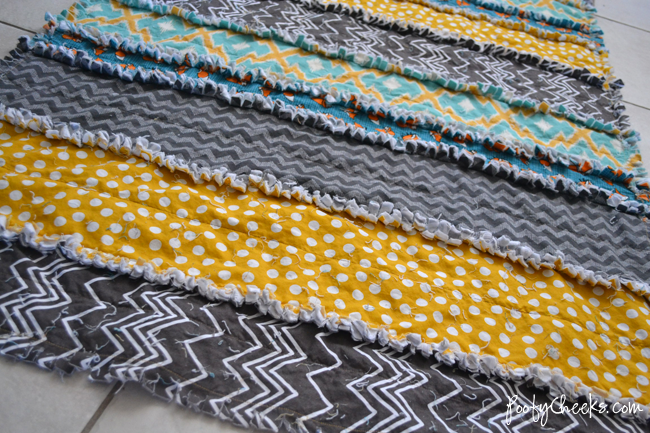
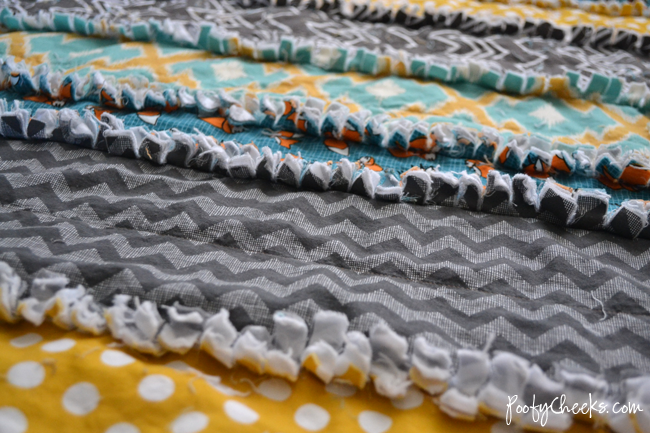 This is the back of the quilt – I used a white and gray chevron flannel I picked up at Joann Fabrics.
 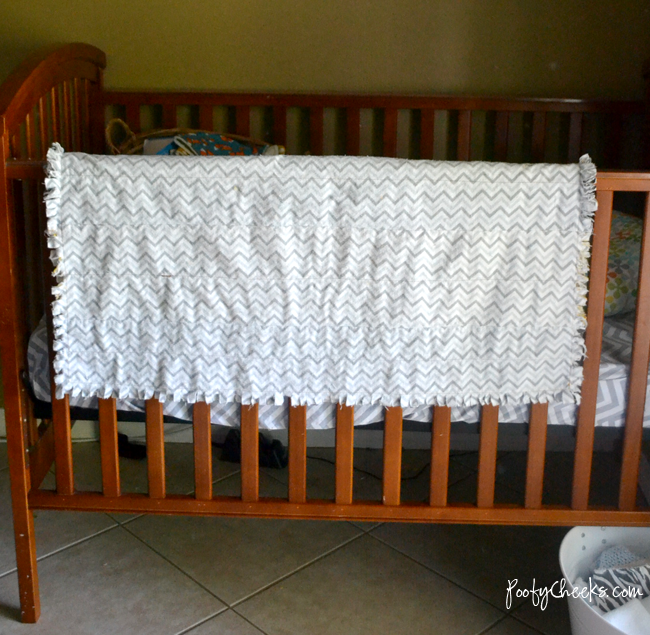 I also purchased the dark gray/ light gray chevron cotton and the yellow and white polka dot cotton fabrics at Joann Fabrics. All of the other fabrics came from the ETSY shop Bobbie Lou Fabrics.
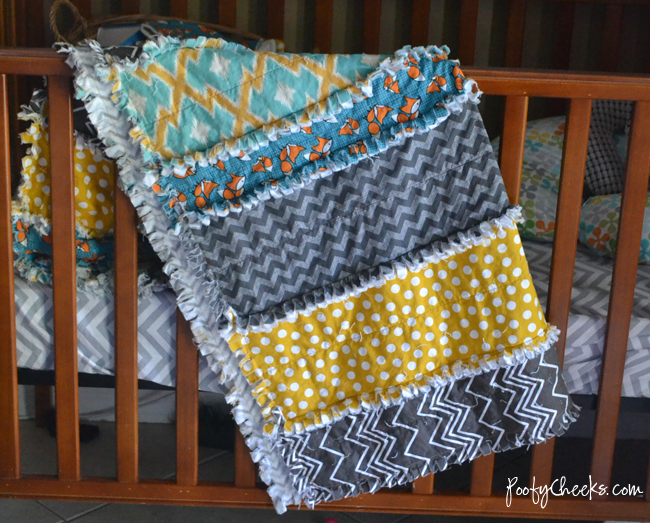
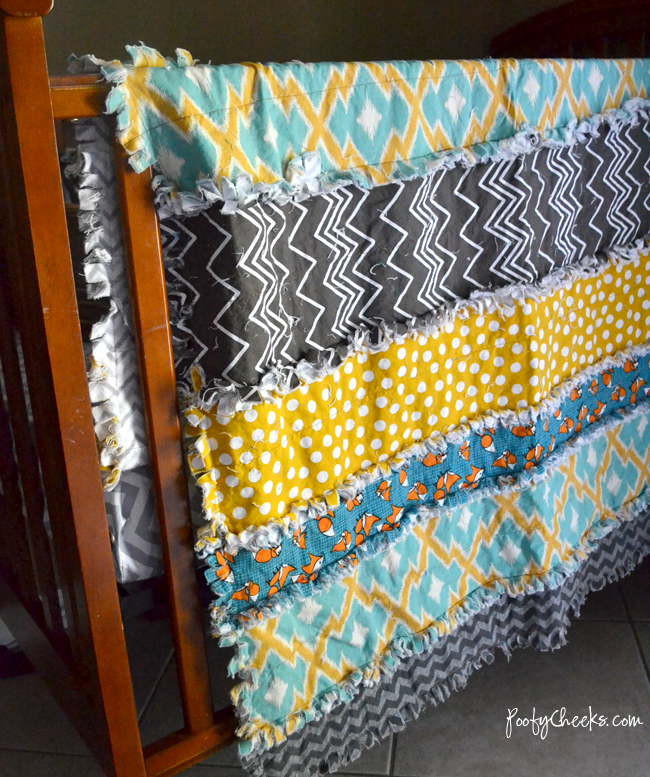 I washed my quilt twice but as you can see I probably need to wash it one more time or use a lint roller to get off all the extra little strings still on it. I’m super proud of how the quilt turned out and after making it in one day I suggest this type of quilt to anyone who wants something unique but doesn’t have weeks or months to work on a full blown quilt! I get impatient and tired of projects that take too long so that is why rag quilts are my favorite! You can see the entire nursery nook HERE – and how I used the fabric scraps to make a mobile HERE. I also used some of the fabric scraps to make minky burp clothes like THESE.Enjoy,


 I party HERE Check out the Poofy Cheeks Blog Pinterest Board for other craft and recipe ideas! Follow Poofy Cheeks’s board Poofy Cheeks Blog on Pinterest.

Terri
Monday 5th of August 2019
I love your strip quilt. You mentioned the top layer being cotton. Is this 100% cotton? Would this work using flannel for both the top and bottom layers?
Emily
Wednesday 13th of July 2016
So. Weird! I came across your blog via Pinterest looking for a rag quilt tutorial...
I'm also from Rochelle, IL. lol I actually recognize your face from high school. I believe you were in my brothers class in 2005. What a coincidence!
Regardless, great tut! I plan on using it for a quilt to send to some friends with a baby in the NICU. <3
Deborah Koerperich
Sunday 8th of March 2015
Can you use cotton for the back? Does it need to be 100% cotton? Thanks
Anonymous
Tuesday 3rd of March 2015
I just made my first and love it although I did have an issue when completed....it seems a bit "warped" when completed. I know I did very straight and even sizes when cutting and I used a seam guide when sewing so I don't know how I got this problem? Any suggestions would be appreciated as I want to make another one SOON.
poofycheeks
Tuesday 3rd of March 2015
Yay!! Cutting and sewing straight seem to be the hardest parts no matter how much you try to keep everything even!! Did you iron your fabrics before sewing? That can help incase you have wrinkles making things uneven. Also did you trim the sides after you finished sewing the pieces? See this post as it gives a better picture of what I did... http://poofycheeks.com/2013/02/strip-rag-quilt-sewing-tutorial.html (the very first picture shows how uneven the strips were before I tripped them and trim on both sides as it seems to shift. I hope that helps!
Anonymous
Thursday 1st of January 2015
"Sew straight down the middle of the fabrics long ways". This step confuses me. Are we sewing down the middle of each fabric/flannel piecse as an easy way to hold the two pieces together, until we sew the strips together? Do we remove that stitching once the blanket is finished?
poofycheeks
Saturday 3rd of January 2015
Sewing down the middle will keep the two pieces of each strip together for when you sew the strips to one another. You will leave that stich in after finished. Look at the last picture from the post -- you can see the stitch if you look at the top strip where it folds over the crib. :)