Poofy Cheeks

Cut Files for Silhouette Cameo and Cricut Machines

  • Silhouette & Cricut
    • Cut File Library
    • Project Ideas
    • Membership Site
    • Cheapest Supplies
  • Recipes
  • Crafts
    • Crafts
    • Parties
    • Printables
  • Home DIY
    • All Home DIY
    • Our Home
  • Contact Me
  • Shops
    • Cut File Membership
    • Cut File + Mockup Shop
    • Vanadey Bride
    • TShirt Shop
  • Blog

Shabby Christmas Letters from Leyton Smiles

12/09/10 | Uncategorized

**This post contains affiliate links to products I use and recommend. I may recieve a small commission, at no cost to you, if you make a purchase through a link.**
Today I am showing a craft by Lisa of Letyon Smiles. I came across her blog because we are both members of the ‘Busy Moms of Etsy Team.’ Her ETSY shop is ADORABLE! The perfect shop for those of you who have an expectant mother or newborn on your list of people to by Christmas gifts for.
Neck Tie Burp Cloth Set of 2 in Orange and Red Paisley

—————————————————

She posted a how-to for ‘Shabby Christmas Letters – On the Cheap,’ which I thought were right up my alley. I love mod podge, cheap crafts, and I love Christmas! Here is her how-to on the letters.
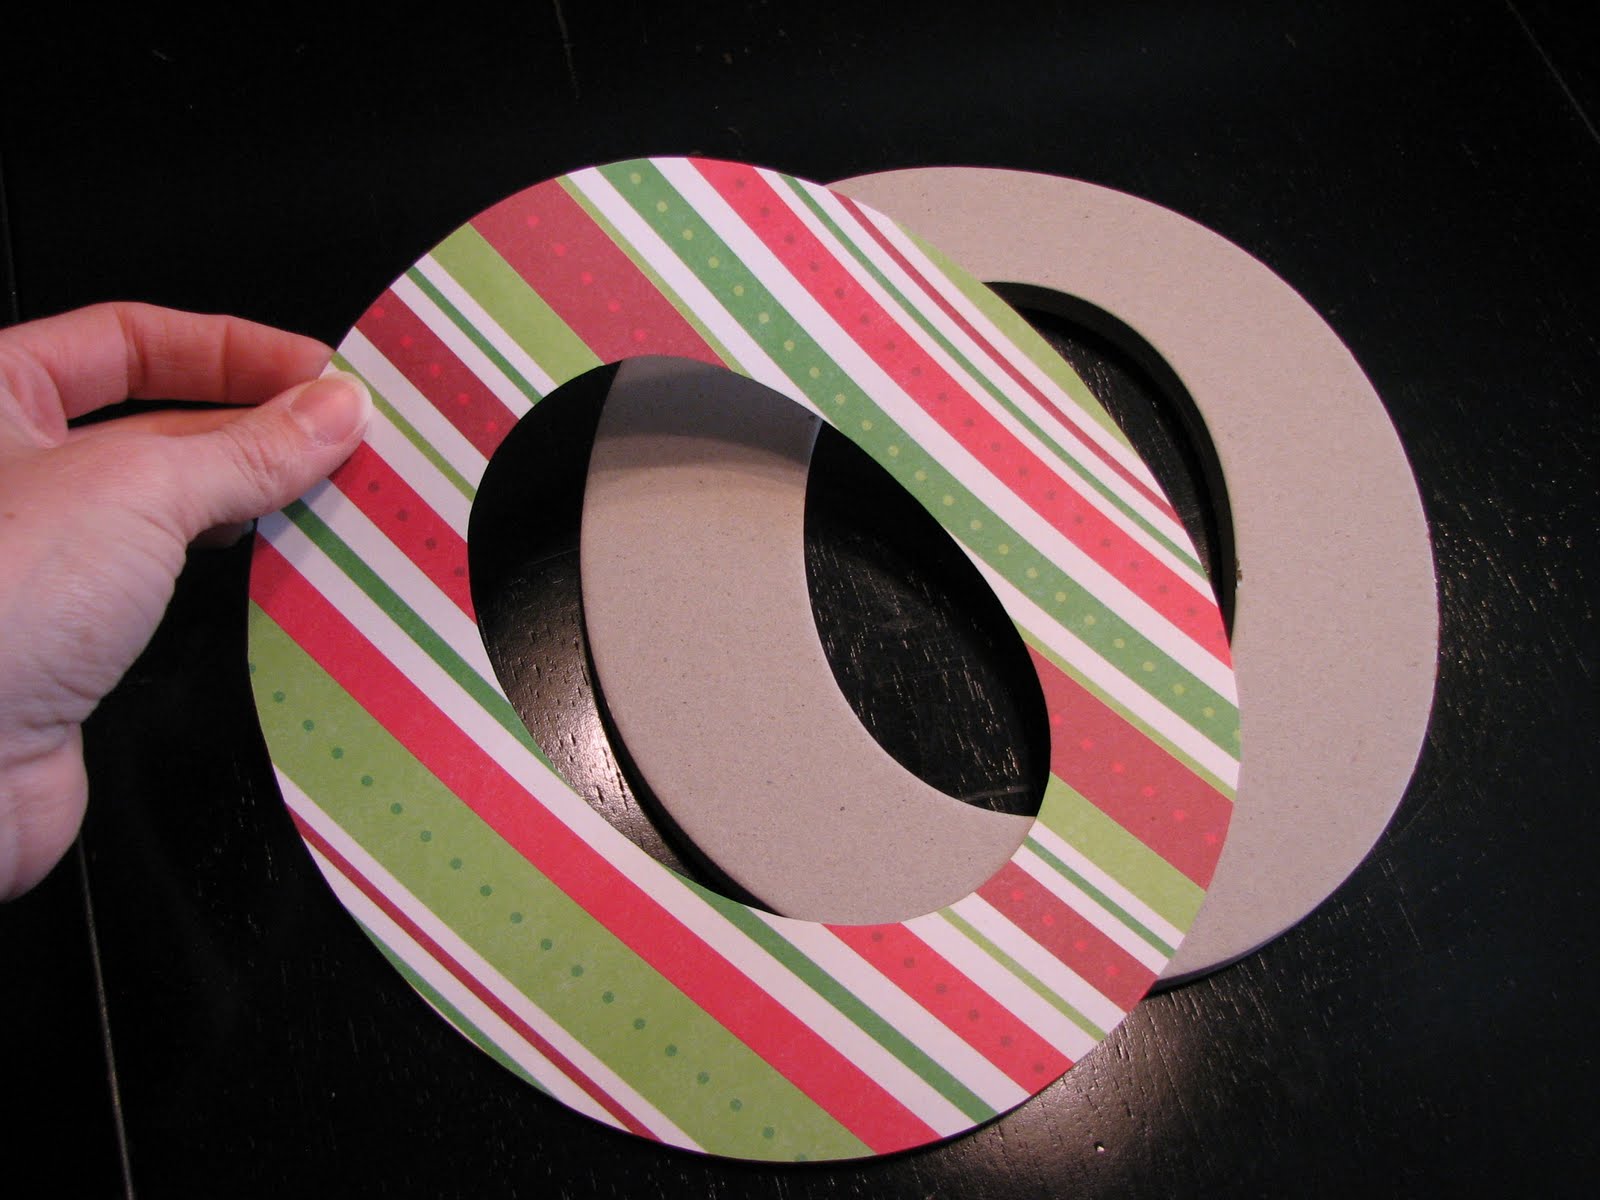
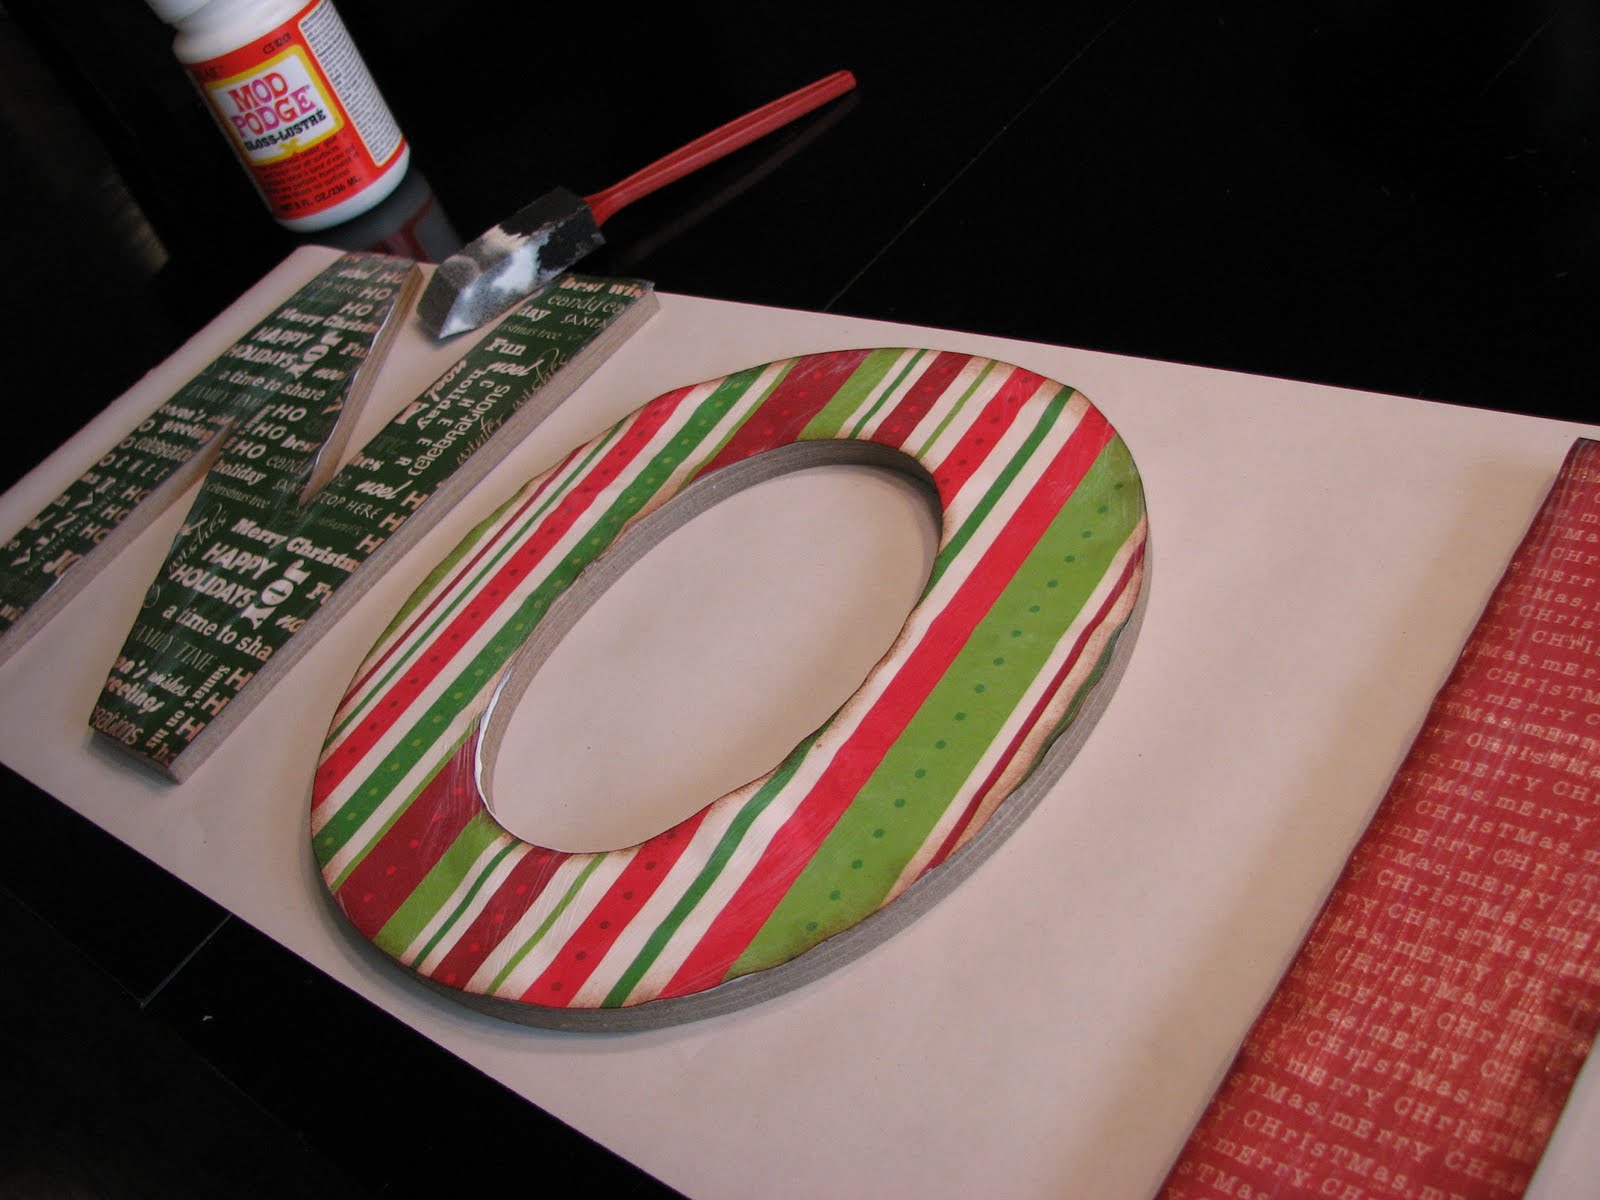
I started out buying chipboard letters at our local Arts & Crafts store. I also bought different Christmas scrapbook paper (each piece big enough to trace a letter on), and a tiny tube of silver glitter, and that was it (just because I’m a sucker for all things shiny at Christmas). You’ll also need modge podge, or something similar, which I already had.

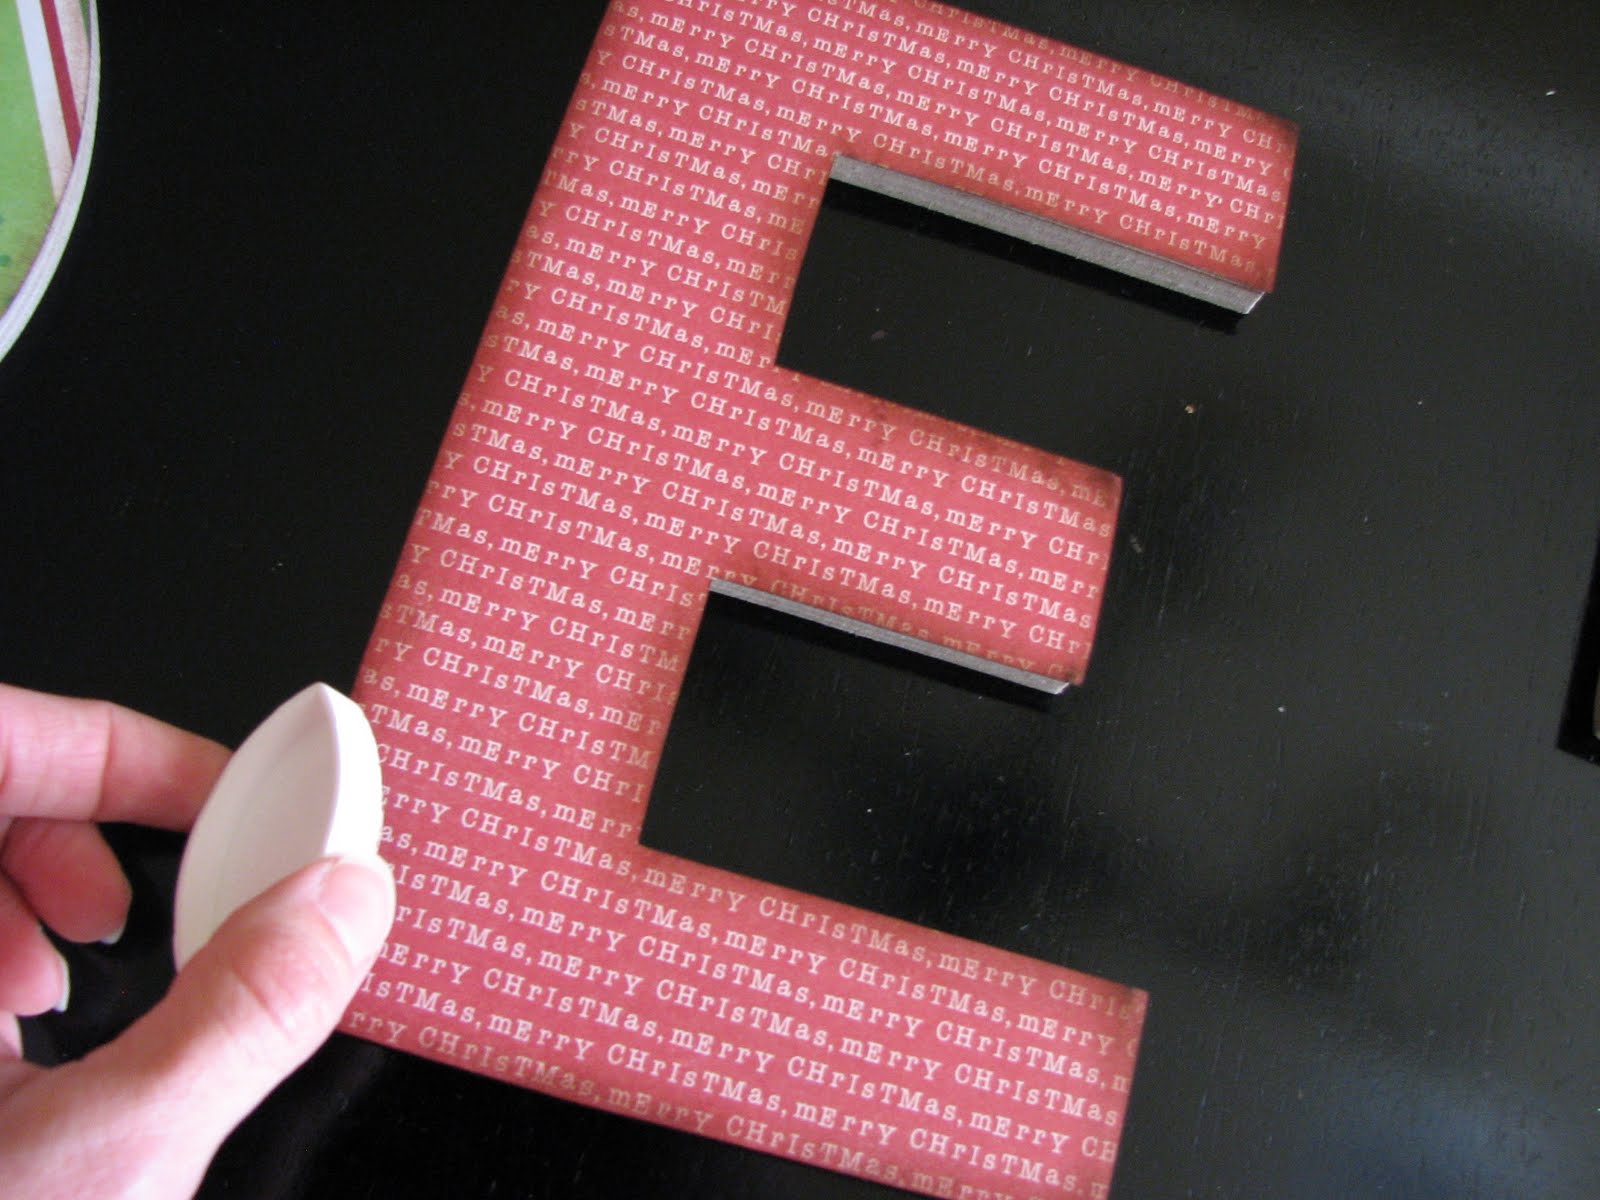
I started tracing each letter on the paper and cutting them out. I then used modge podge to glue the cutouts to the letters. Be careful here to use a VERY thin layer of glue, or the paper will bubble. Mine bubbled a bit, but I have them up high and no one will ever notice. 🙂

The modge podge dries very quickly, so as soon as it was dry, I used scrapbook ink (I used brown) to distress all of the edges. You can do this as heavy as you like – I went heavy since I wanted to be see it from far away.

Once the ink dried (again, super quick), I modge podged over the top of the letters to seal it and give it a nice finish. Yeah, I know. Bubbles. Pretend you don’t see them. 🙂


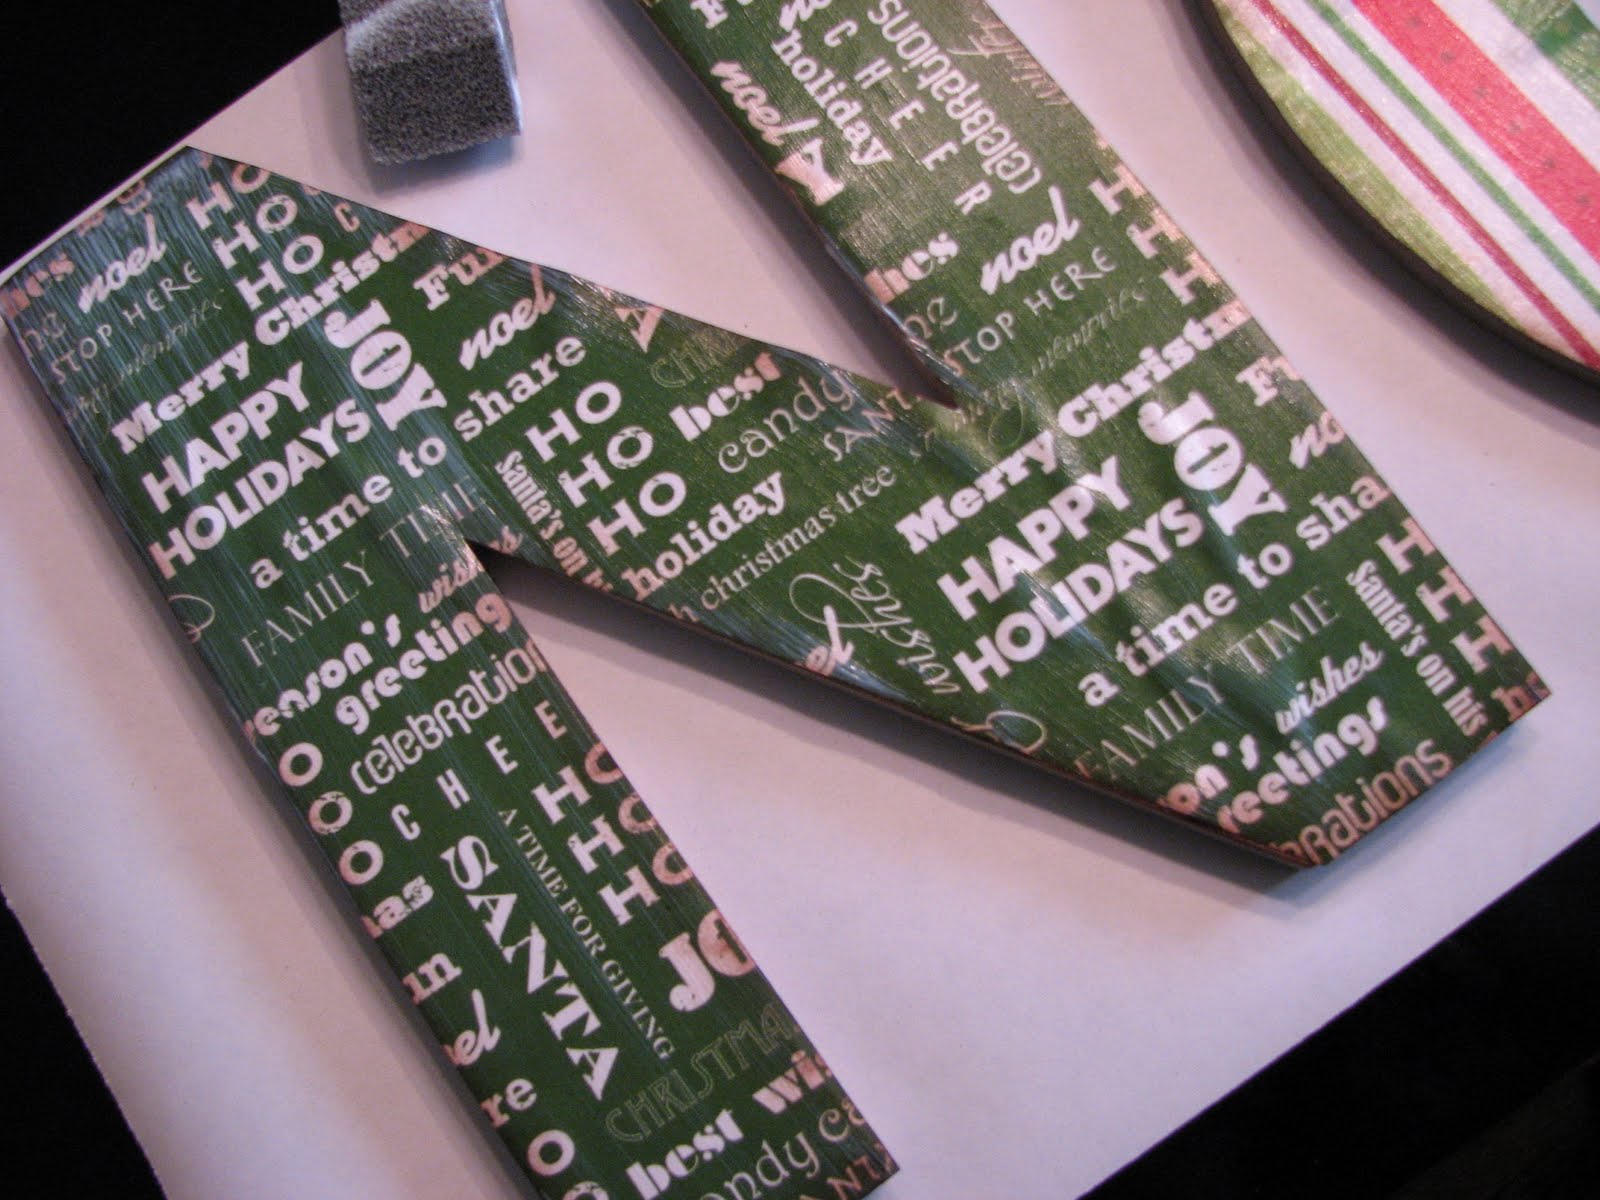
Last, I painted a little more modge podge on each of the letter edges and dipped them in the glitter. You really can’t see much of this where they are displayed, but it gives them a finished look and a little extra sparkle. 🙂
Total cost –

  • Letters – $4 for 4
  • Scrapbook paper – $2.50 for 4 sheets
  • Glitter – $1.50
  • $8 total

And the finished product – I love it!

Now for $8 I’m making myself some letters! You should too! If nothing else check out Lisa’s ETSY shop or her blog!

Enjoy,

Follow Poofy Cheeks on InstagramFollow Poofy Cheeks on TwitterFollow Poofy Cheeks on PinterestFollow Poofy Cheeks on Facebook I party HERE

Comments | Be the first!

About Kelsey

Kelsey is a wife and mom of four living in Central Florida. She shares recipes, crafts, DIY tutorials and so much more. Her passion is creating with her Silhouette and Cricut machines and sharing free cut files.

« ETSY Inspiration – Shabby Chic Country Christmas
Stuffed Green Pepper Recipe »

Leave a Reply Cancel reply

Your email address will not be published. Required fields are marked *

New on the Blog

  • Sublimation Printing at Home – Sublimation for Beginners
  • Spring Break Crew Cut File – Cricut and Silhouette Cameo DXF, SVG, PNG
  • Create Everyday Cut File – Hand Lettered SVG, DXF and PNG for Silhouette and Cricut
Privacy Policy

Recent Posts

Sublimation Printing at Home

Sublimation Printing at Home – Sublimation for Beginners

04/06/2021 By Kelsey Leave a Comment

Spring Break Crew cut file

Spring Break Crew Cut File – Cricut and Silhouette Cameo DXF, SVG, PNG

03/26/2021 By Kelsey Leave a Comment

Create Everyday cut file digital design

Create Everyday Cut File – Hand Lettered SVG, DXF and PNG for Silhouette and Cricut

03/26/2021 By Kelsey 1 Comment

Connect With Me

Categories

Archives

Copyright © 2021 · Tasteful Theme on Genesis Framework · WordPress · Log in