Fall crafts galore! I teamed up with my creative friends to share a fall craft. I am sharing how to make DIY sweater pumpkins. These are no sew pumpkins and I went with a neutral color palette to keep with my fall decor palette.

Where to find Sweaters for DIY Sweater Pumpkins
We got our sweaters from the back of our closet and from our local thrift store. Thrift store sweaters cost a few bucks each and make at least four pumpkins.
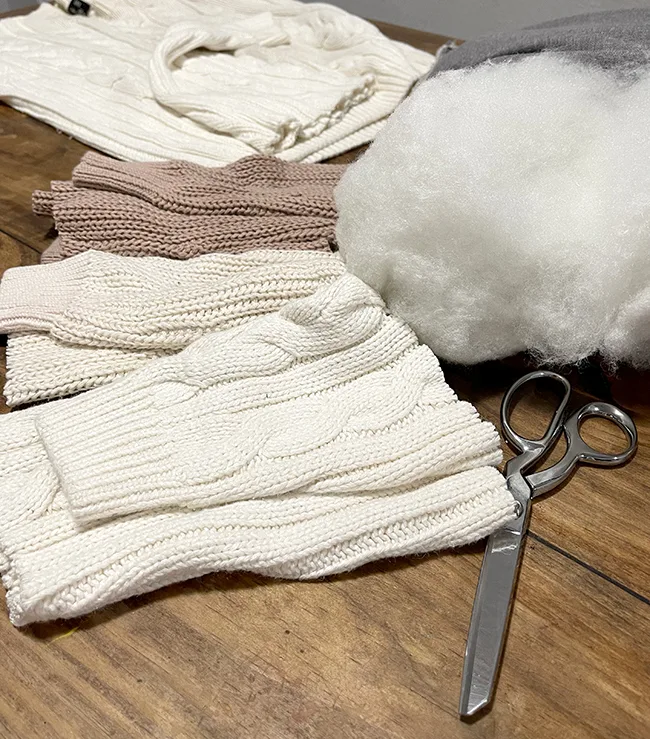
DIY Sweater Pumpkin Supplies
You will need the following supplies and tools to make sweater pumpkins.
- Sweaters – each sweater will make at least four pumpkins
- Scissors – a nice sharp pair, preferably ones only used for fabric
- Hot glue gun and glue sticks
- Yarn or twine
- Polyfil – You could also use the filling from an old pillow. I had a pillow that was going flat so for my tutorial I pulled the stuffing from that for my pumpkins. It made them that much cheaper to make.
- Extra embellishments – this is optional but you can use trims, ribbons, or buttons. I used faux leather scraps for leaves.


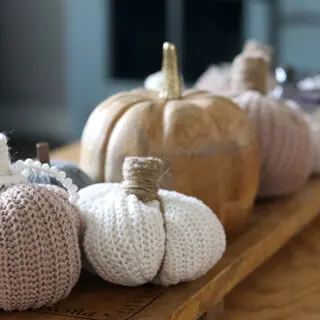
DIY Sweater Pumpkins
Materials
- Long Sleeve Sweater
- Yarn or Twine
- Poly-fil
- Faux Leather (optional)
Tools
- Scissors
- Glue Gun
Instructions
- Start out by cutting the sleeves off of the sweater. Then cut each sleeve in half or even in thirds

- Flip one peice inside out and gather the ends of the widest end and tie a knot around them using yarn
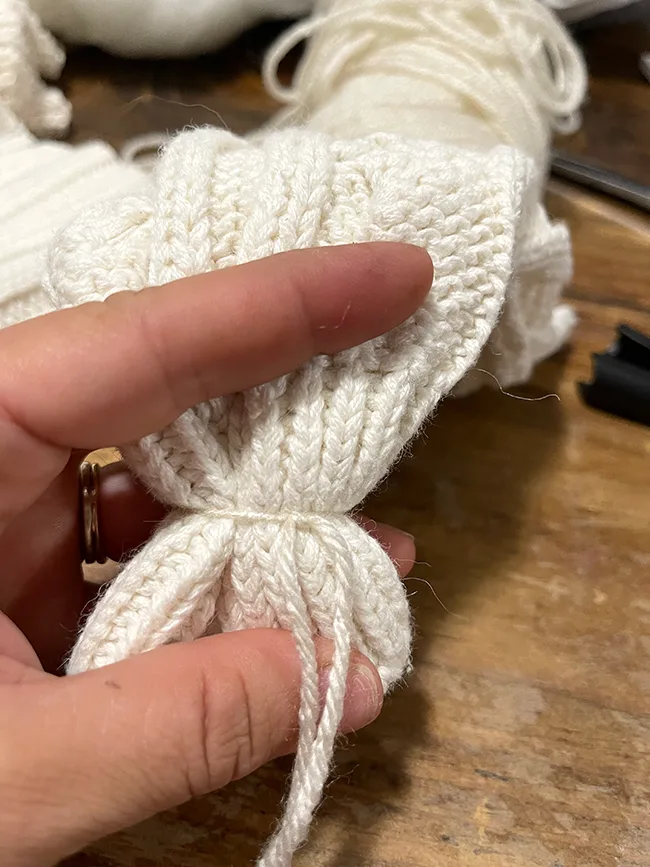
- Flip the fabric back to right side out and fill with stuffing 2/3 of the way full
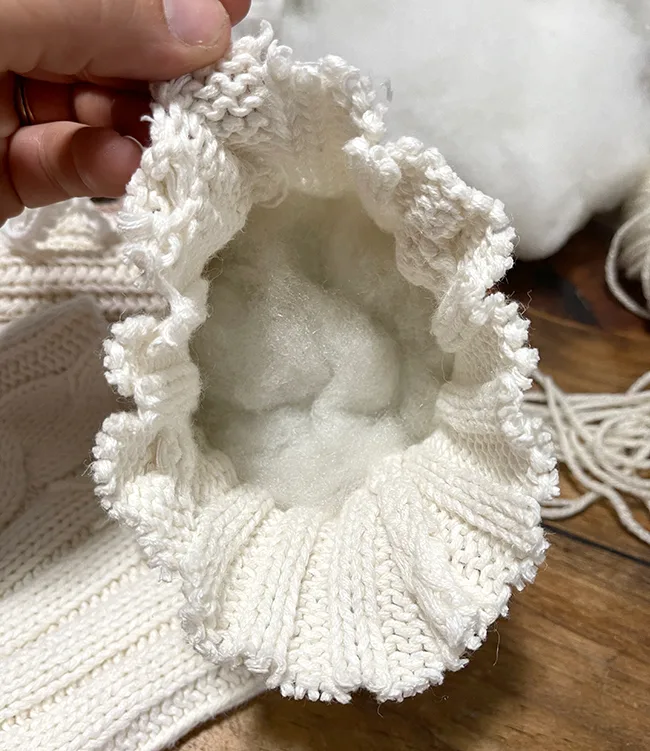
- Gather the sleeve fabric at the open end and tie another knot using yarn. Then start wrapping the yarn around and securing with dots of hot glue
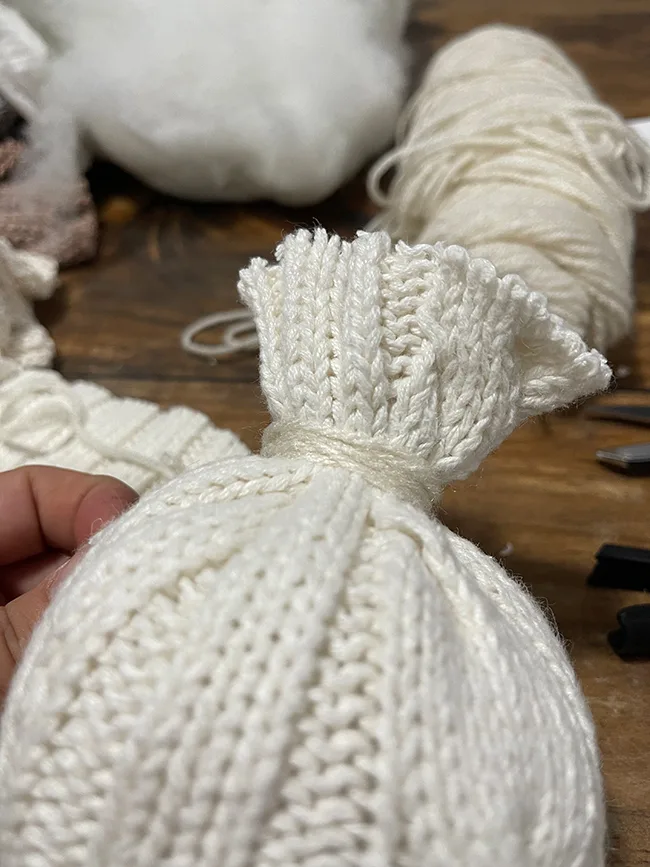
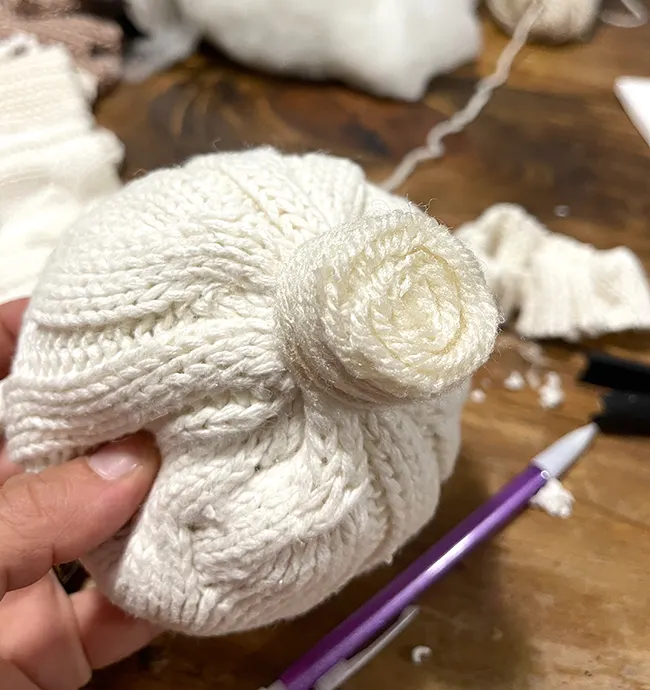
- Continue to glue and wrap the yarn as little or much as you want to create the stem. Then trim the excess fabric to create a flat top
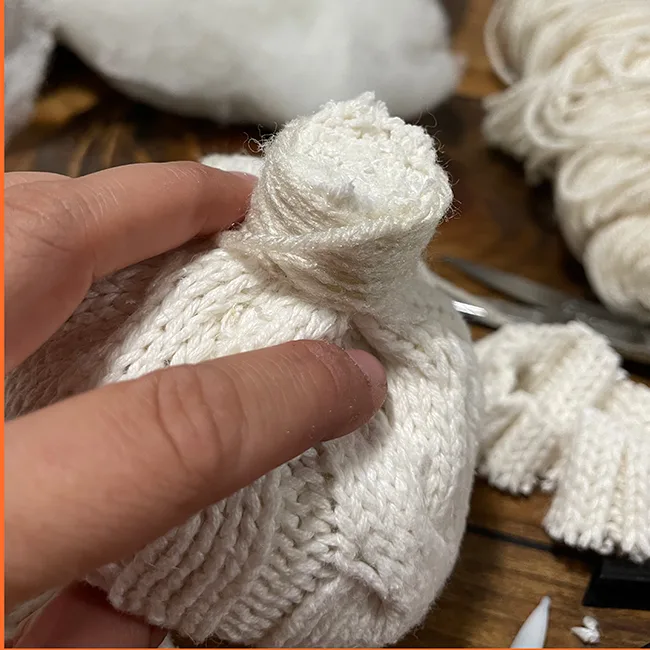
- Stop there or use hot glue and wrap the yarn over top in a coil from the outside towards the middle

- If you want to create lines in your pumpkin tie knot one end into the bottom of the sweater pumpkin, wrap up and around the stem and back to the bottom. Repeat as many times as desired
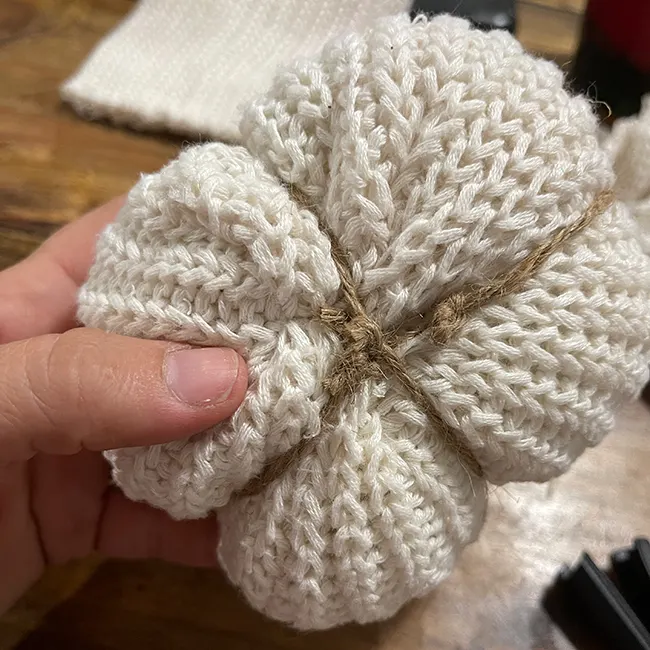
- Embellish with faux leather leaves or other findings
Notes
We used sweaters that we purchased for a couple dollars at a thrift store.
More Fall Crafts
Each month I’m crafting and creating with the ladies from Team Creative Crafts. I’m linking to their fall crafts below so be sure to check them out too!

- Stuffed Autum Gourd from Laura Kelly Designs
- Dollar Tree Fall Sign from Laura’s Crafty Life
- DIY Fall Wreath from Smiling Colors
- Free Fall Printable from Sunshine & Munchkins
- Wooden Fall Wreath from Little Dove
- I Love Fall Most of All from Simply Made Fun
- How to Make Sweater Pumpkins from Poofy Cheeks
- Die-Cut Pumpkin Cards from Bella Crafts Publishing
- Easy DIY Book Pumpkin from Creatively Beth
- Resin Fall Leaf Coasters from Artsy Fartsy Mama
- Easy Fall Wreath from Liz on Call
- Rustic Wood Slice Pumpkin DIY from DoodleCraft
- DIY Fall Sign from Ginger Snap Crafts
- DIY Autum Sign from Crafting Cheerfully
- Crochet Stitch Pumpkins from 5 Little Monsters
- Grateful Cloth Napkin SVG from Polka Dotted Blue Jay


40+ Best Fall Crafts to Create - Bella Crafts Publishing
Tuesday 14th of September 2021
[…] How to Make Sweater Pumpkins from Poofy Cheeks […]
50+ of the BEST Fall Crafts and Home Decor - Creatively Beth
Saturday 11th of September 2021
[…] with Poofy Cheeks is showing us How to Make DIY No-Sew Sweater Pumpkins that are just […]
Easy DIY Book Pumpkin with Dollar Tree Supplies - Creatively Beth
Saturday 11th of September 2021
[…] How to Make Sweater Pumpkins from Poofy Cheeks […]
wooden fall wreath with free materials - Little Dove Blog
Thursday 9th of September 2021
[…] How to Make Sweater Pumpkins from Poofy Cheeks […]
Easy Die-Cut Pumpkin Cards - Bella Crafts Publishing
Thursday 9th of September 2021
[…] How to Make Sweater Pumpkins from Poofy Cheeks […]