
Bubblegum Necklace Tutorial.
I had an obsession with buying bubblegum necklaces for Delilah. There are so many adorable bubblegum necklaces on ETSY that I found myself trying to find one to match every cute outfit she had. At $10 or more per necklace they started to add up.
At the time I was a stay-at-home mom so our budget was pretty tight. I decided to grab the supplies and try making them myself. After all the big chunky beads couldn’t be too hard to work with.
The necklaces really are a breeze to make. I was putting together bubblegum necklace color combos for every outfit and holiday in no time. I would often make matching leg warmers, and boutique style hair bows. Oh how I miss dressing her in the days before she wanted to have opinions on what she wore.

Bubblegum Necklace Tutorial
This post contains affiliate links to products I use and recommend. By making a purchase I may receive a small commission.
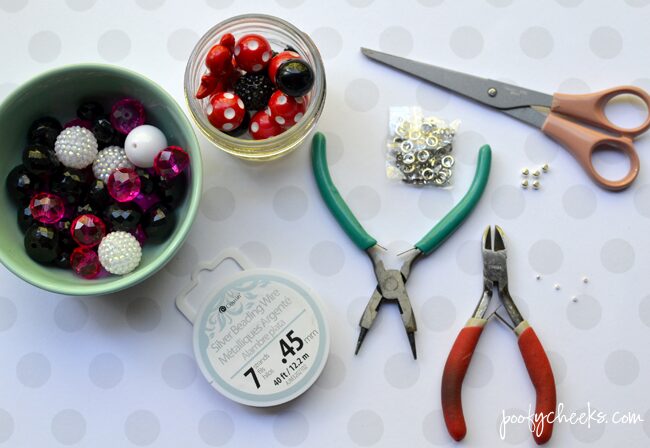
Bubblegum Necklace Supplies
- 20 Chunky Beads (20mm)
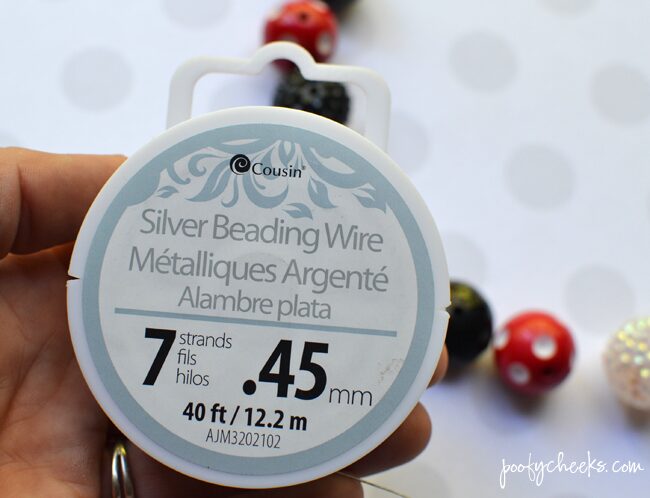
- .45mm Silver Beading Wire
- 22 Spacer Beads (4mm)
- 2 crimp beads
- Wire cutters
- Jewelry Pliers
- Clasp
- Pendant (optional)
Where to buy 20mm Bubblegum Necklace Beads
I have found large beads in Hobby Lobby from time to time. I always check the clearance section first. The pink and black ones in the blue bowl were from Hobby Lobby.
I buy most of the bubblegum beads on ETSY because they have the largest selection at the best prices I’ve found. If you know of a place with great prices please share in the comments at the bottom!
Bubblegum Necklace Tutorial
Start your necklace by cutting a 24 inch long piece of beading wire with wire cutters.
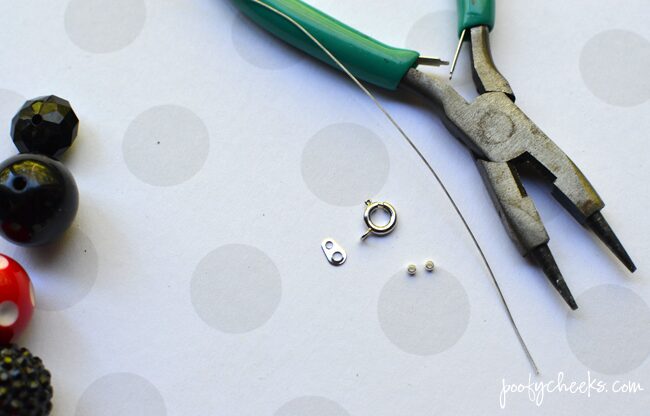
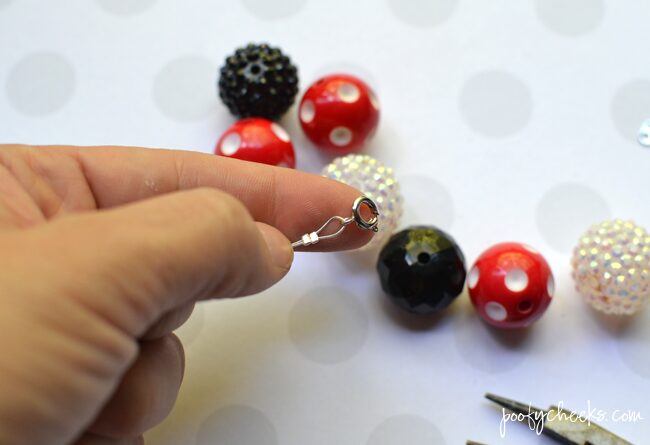
On one end string two crimper beads and the clasp.
Turn the end of the wire around and string back through the crimper beads leaving about 1/4 of an inch between the crimper beads and clasp.

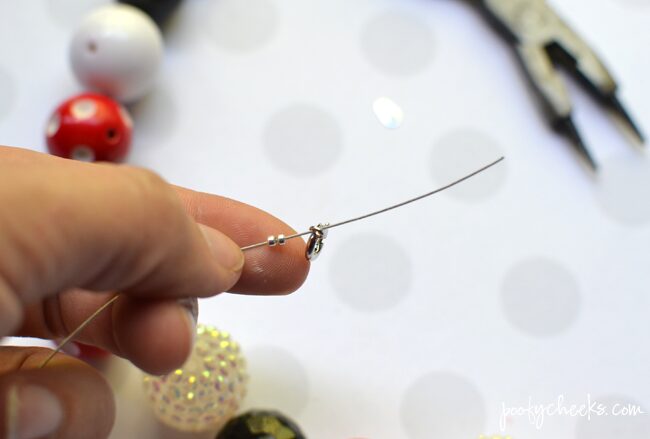
Using a pair of pliers squeeze down on the crimper beads until they are flat and pinching the wire.
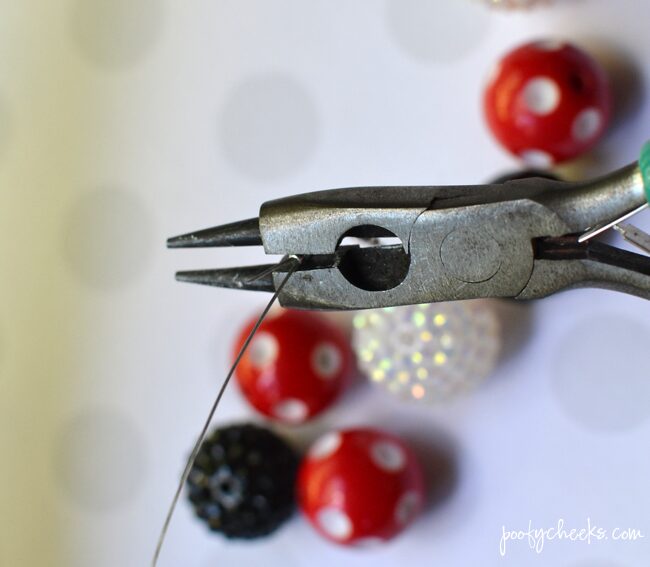
This is how the crimper beads should look. Now you are ready to start beading.
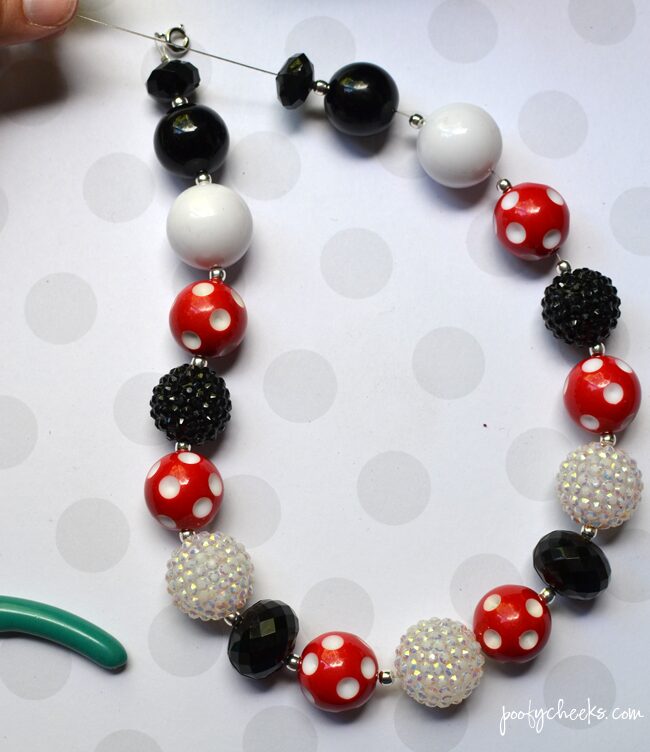
When I’m using multiple colors and types of beads I prefer to lay my beads out. This helps me decide how to string the beads on. I like to keep the extra special beads in the middle as they will be showcased at the front of the necklace.
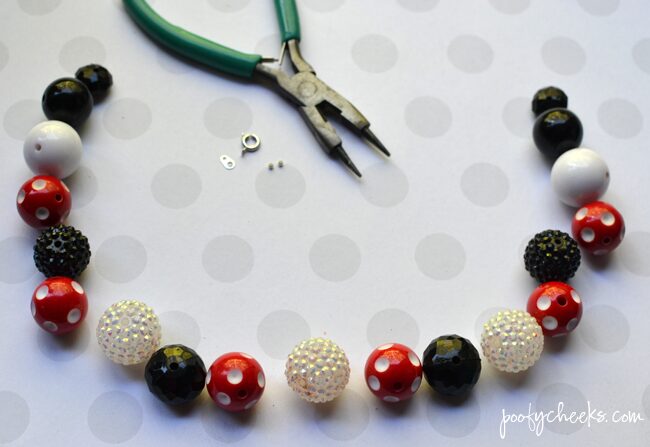
Start by using a small bead or spacer bead and then string the large 20mm beads with a 4mm spacer bead in between each. Without using the spacer bead your necklace won’t bend so don’t try to skip out on those.

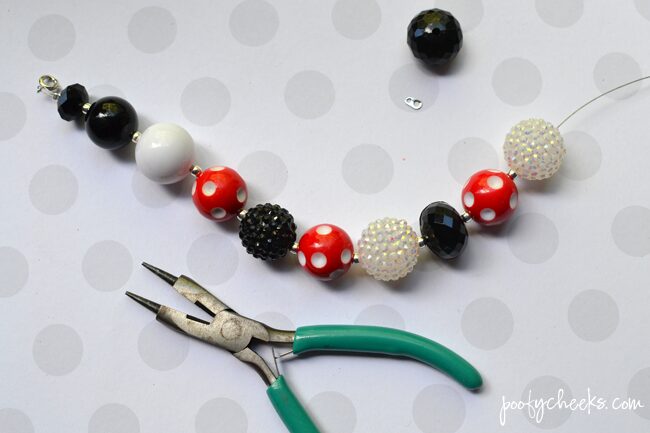
After all of the beads have been strung onto the necklace place another small bead or spacer bead.
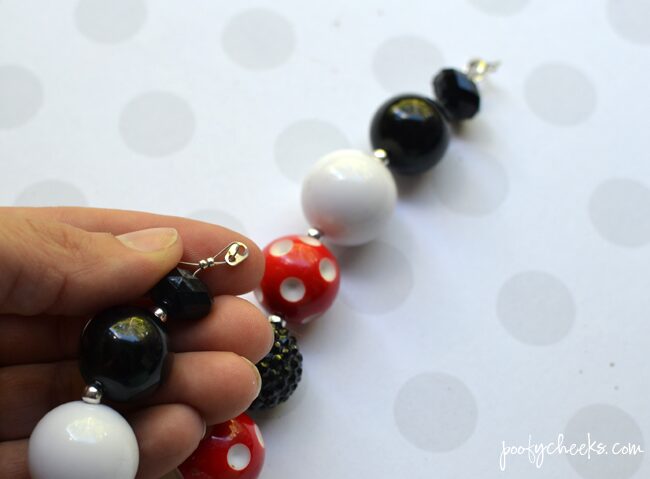
String on two more crimper beads and the other half of the clasp. Then take the end of the wire and string it back through the crimper beads like you did to start.
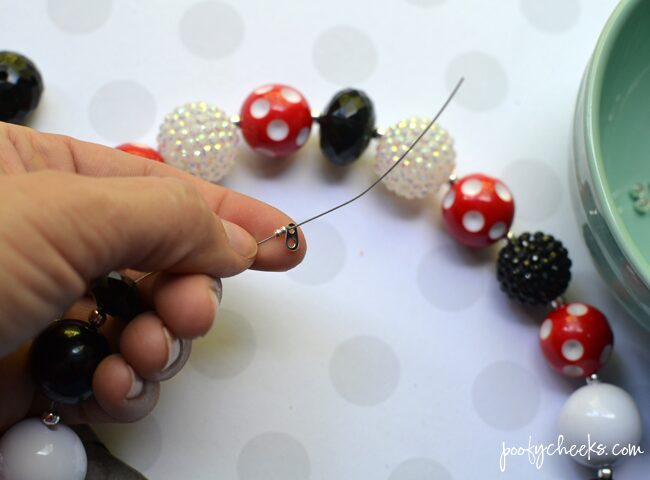
Use the pliers to squeeze the crimps and then the wire cutters to trim off the excess wire.
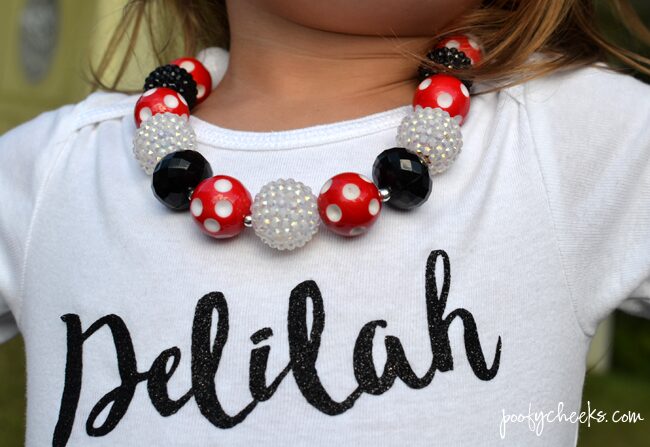
That is all there is to it. My daughter Delilah loves getting to help make her own necklaces.

Lynne Tolleson
Monday 8th of April 2019
The cheapest source I've found for beads pendants clasps and wire is Aliexpress. It takes anywhere from 2 weeks to a month to arrive from China but so worth it when trying to save money.
Amy D HRCreations
Saturday 9th of February 2019
Thank you for sharing this! My 5 year old flips from Fashionista to Punky Brewster style, sometimes all in the same day. I bet she'll enjoy choosing her own colors and helping make these.
I love your daughter's expression!