
Hey! I’m joined by two amazing women, Brittany and Tammy from reNEWed, showing off my new Farmhouse Pie Safe. These two ladies transformed an old dresser into a pie safe straight out of my farmhouse dreams. Wait until you see the before and after!
Brittany and I worked together about eight years ago and thanks to Facebook have followed one another through the years. When our family moved into The House that Votes Built we moved not too far from the girls of reNEWed which sparked us to meet up and talk furniture.
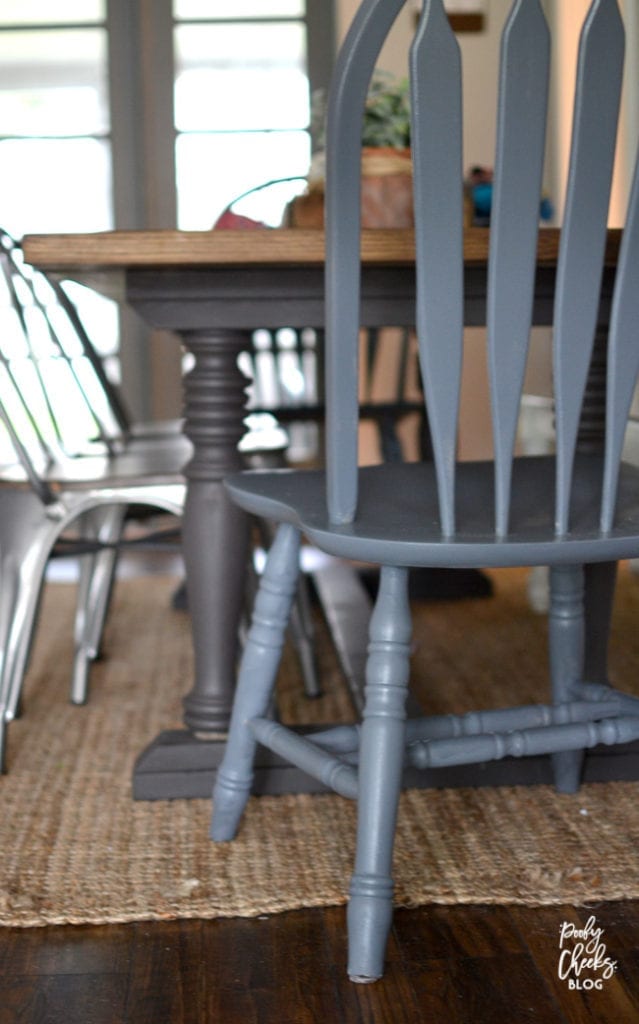
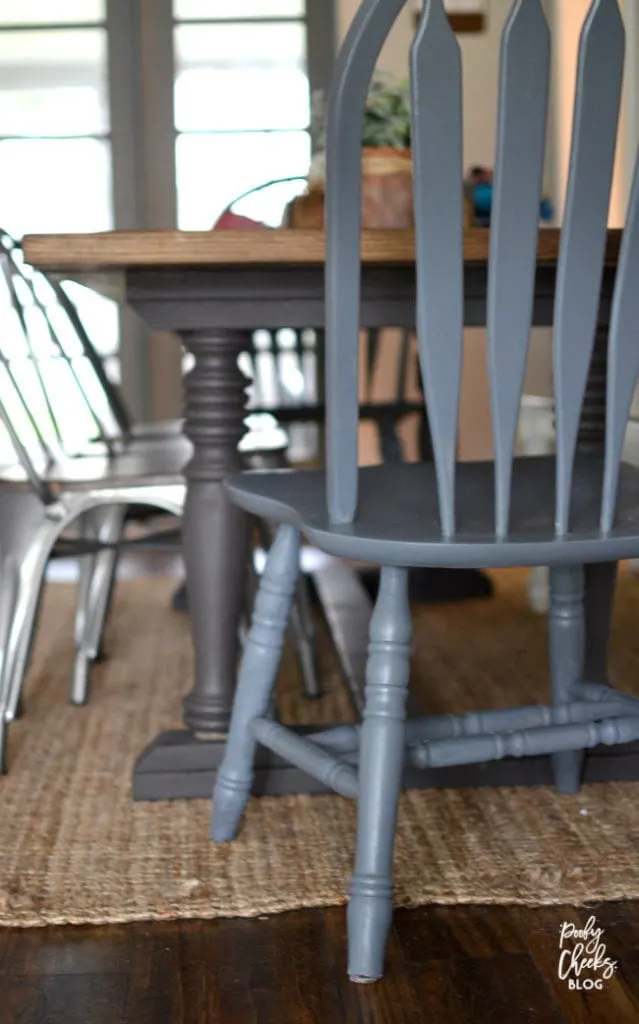
We now have the pie safe plus they updated some old chairs for our dinging table. I couldn’t be more pleased with the way the pieces have helped shape our dining room.

Without further ado – Brittany and Tammy are taking over!
reNEWed Furniture
Hi, we’re Tammy and Brittany, the duo behind reNEWed in Central Florida! We met years ago at church and throughout the years of dinners, birthday parties and growing families we visited each other’s homes quite frequently. Inevitably our conversation would always turn to compliments on one another’s home décor or refurbished furniture.

We both came from similar viewpoints as far as our desires for cozy and welcoming homes for our families and guests. Both of us also had modest funds to accomplish our goals. If you were a fly on the wall for just about any of our conversations, you would hear us spouding off something along the lines of “why would I pay so much for that when I could just do it myself, and have fun doing it!?”
For a few years now we’ve talked about starting some kind of business where we could combine our hobbies and experience crafting, thrifting and repurposing. This year we are dipping our toes in and have had the pleasure of refinishing several pieces. We are still learning and finding our niche and enjoying the ride.

When Kelsey described to us some of the things she was looking for in the dining room of her new home, we jumped on the opportunity to create something for her. The two spindle back dining chairs she wanted painted were pretty straightforward. We used a combination of chalk pint in two colors to come up with a nice dark shade of grey to accent her metal chairs.
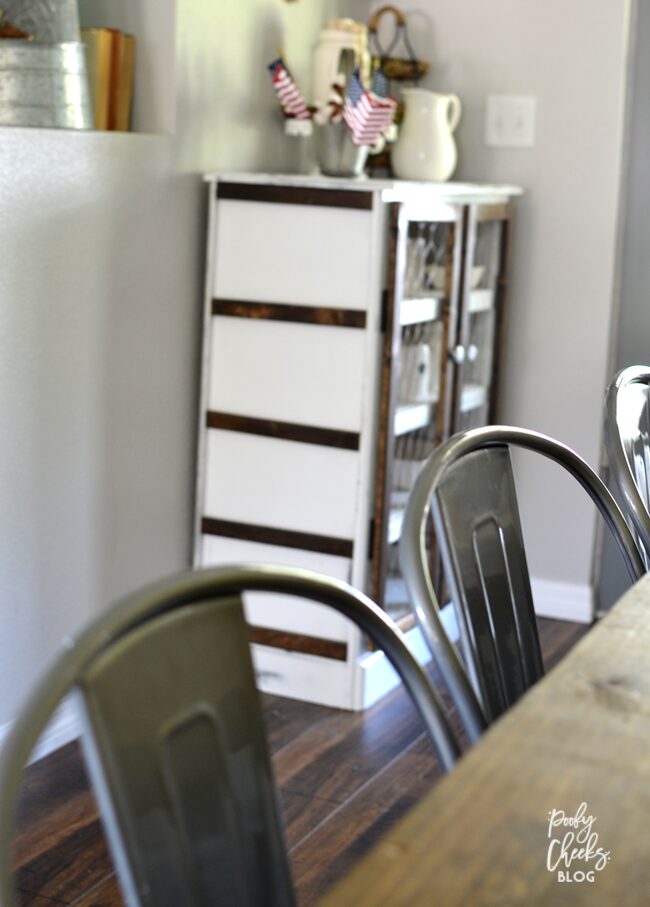
As for the corner piece she gave us free reign mentioning that something along the lines of a pie safe would go perfect there. We looked to Pinterest for some inspiration and pinned a few hundred ideas – HA not really but if felt like it! Ultimately, we couldn’t start much without having a piece of furniture to start with. As luck would have it, only a few weeks later Tammy spied a small dresser listed on Facebook Marketplace that seemed to find the dimensions we needed perfectly. We picked it up that afternoon and started planning.
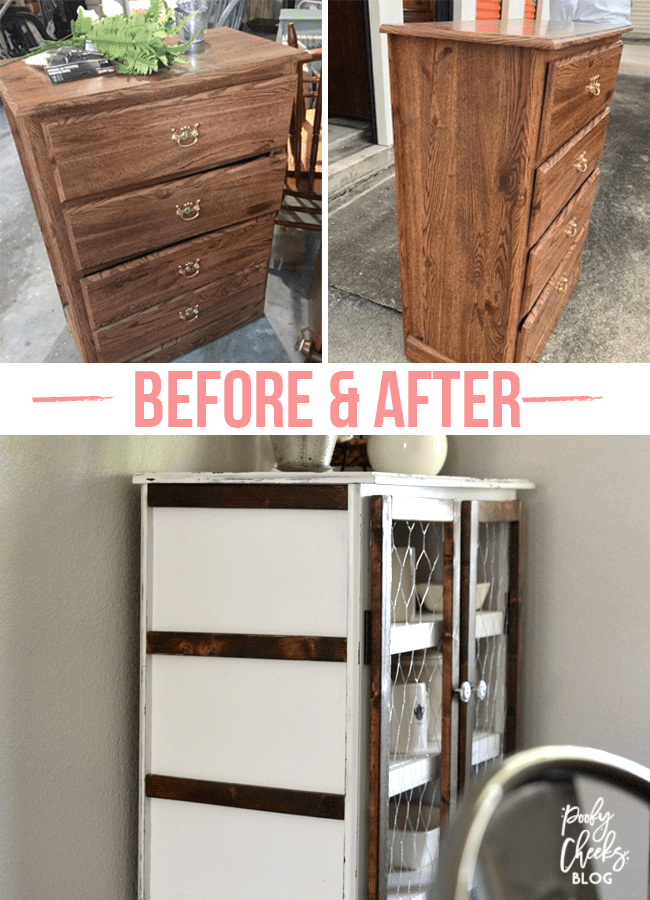
Before Pictures of the Pie Safe
Here are the before pictures of the piece from the day we got it. I think we have all seen a dresser similar or possibly even exactly the same.
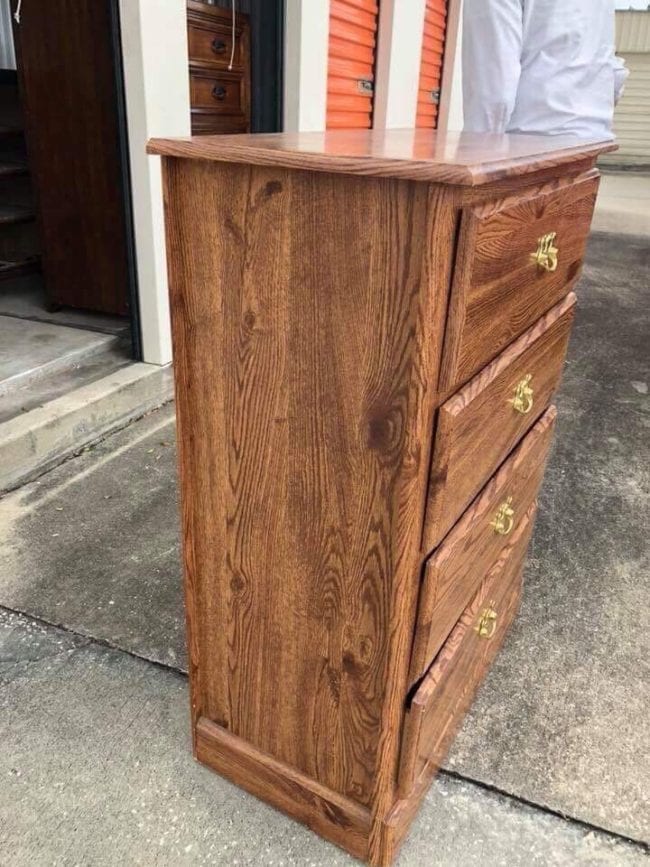
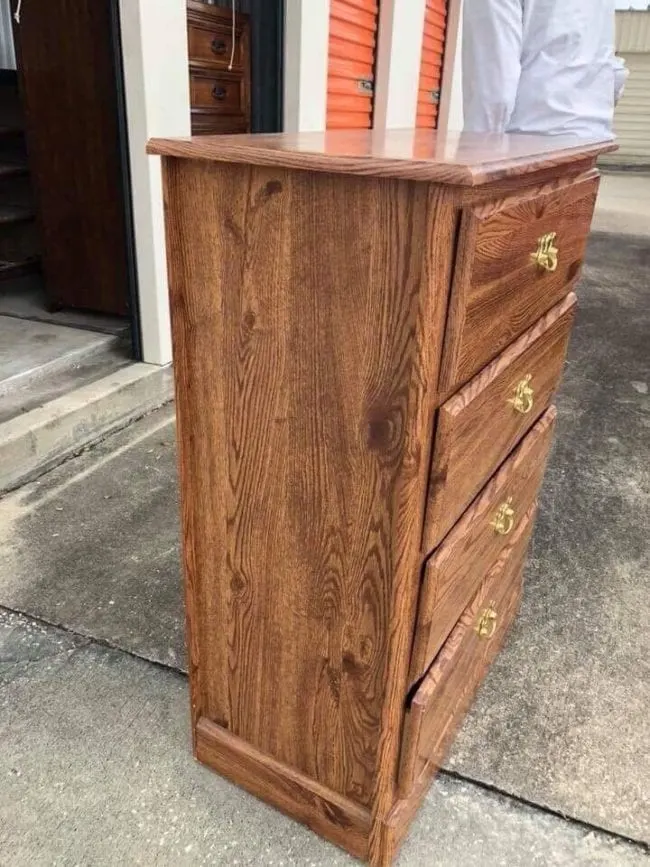
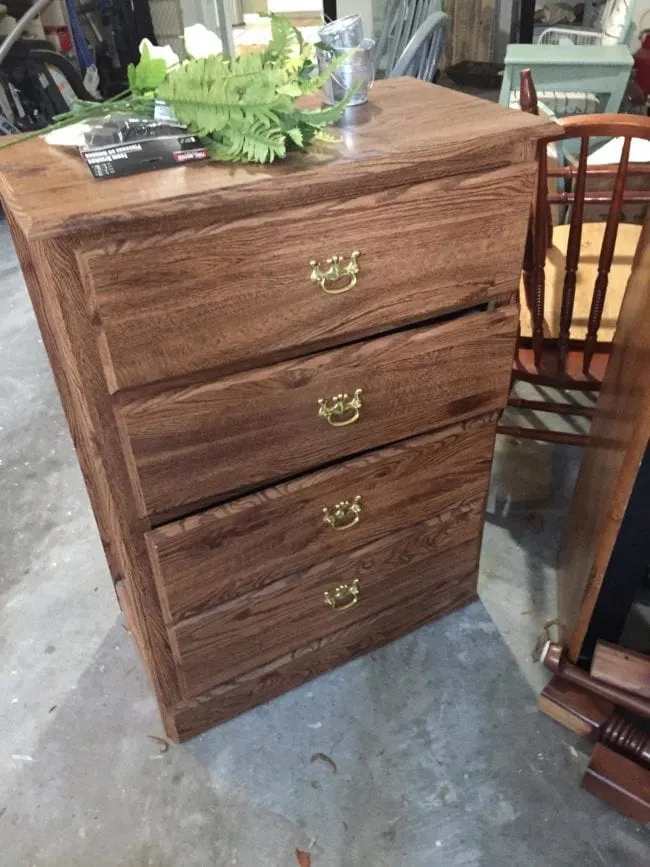
Dresser Pie Safe
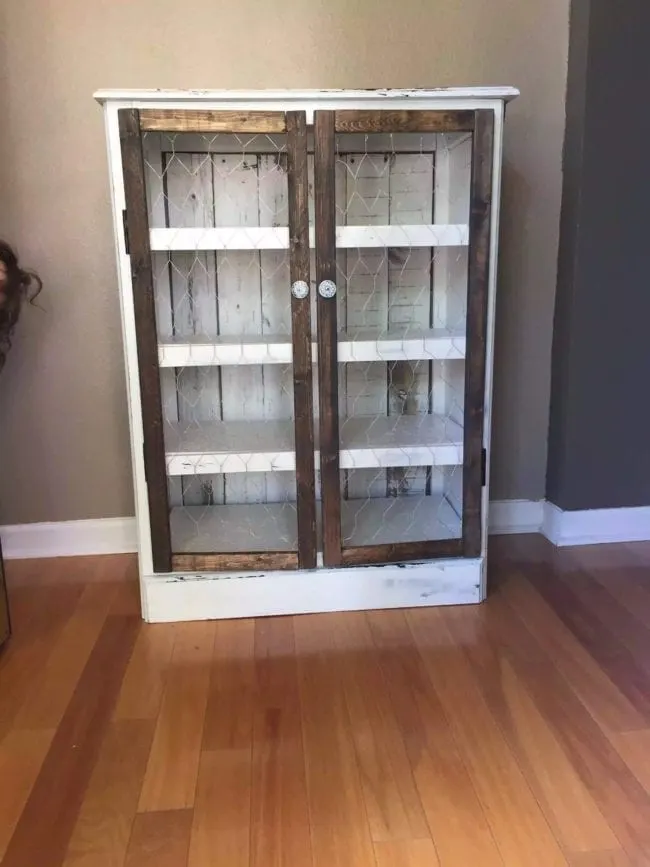
After pulling out the drawers and disassembling the interior hardware that held them in place, we had an empty shell to work with. Even though we knew we would paint the dresser white, we didn’t want the original laminate to show through when we distressed it. We wanted a darker black tone to pull from the darker table base in Kelsey’s dining room. So we started by covering the whole dresser with a rough coat of black spray paint.
Follow reNEWed on Facebook // Follow reNEWed on Instagram to see more of their amazing transformations.
Next we strategically applied Vaseline to the edges of the dresser as well as a few random spots. Once we applied several coasts of a white latex pain tin a satin finish we lightly sanded the locations we had applied the Vaseline. Voila! The black spray paint showed through slightly and lendt itself to a fun, distressed finish.
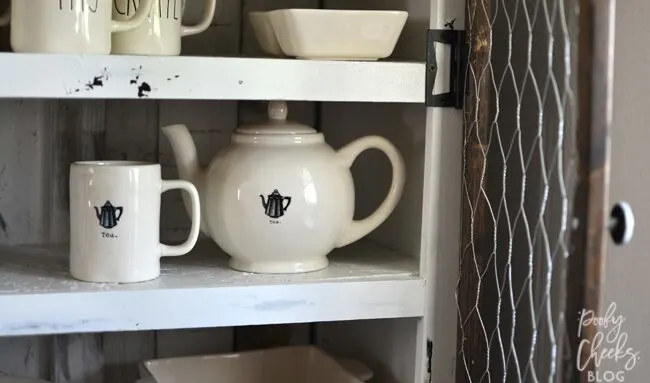
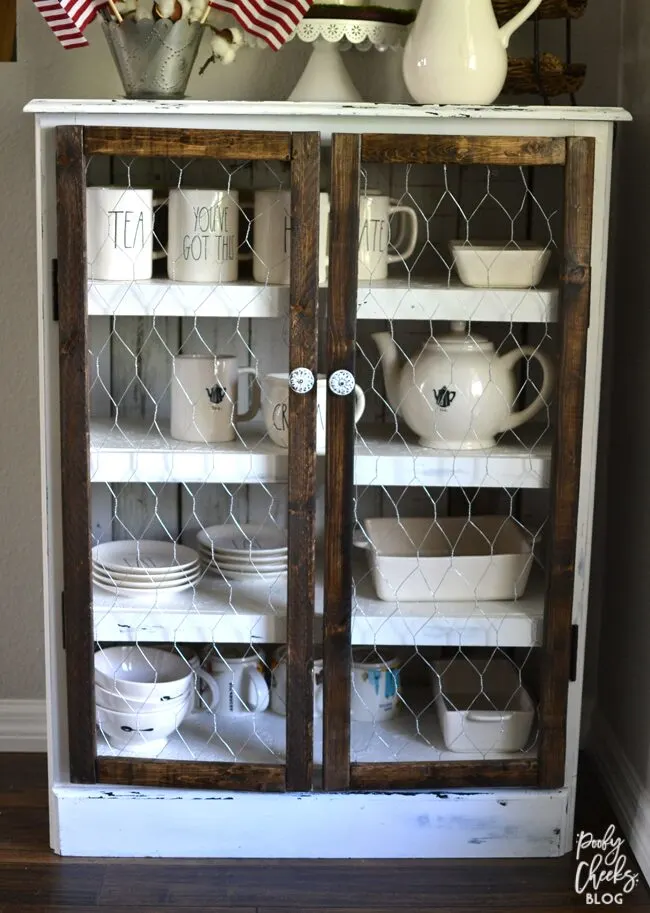
We did some measuring to determine what size shelves we would need. We cut the boards down to size and used corner braces to install four shelves in place of the drawers.

After painting the shelve pieces white we cut and stained some molding pieces to add to the sides.
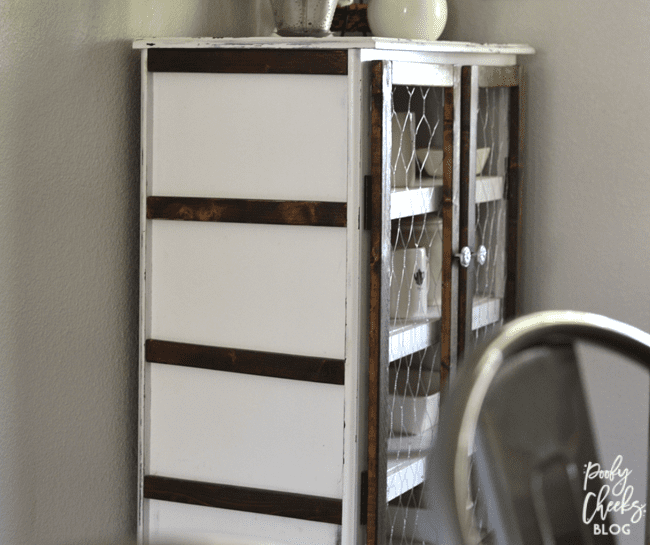
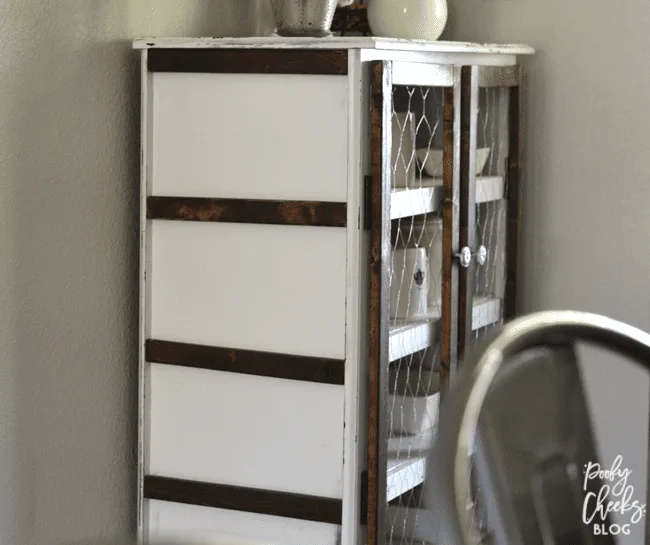
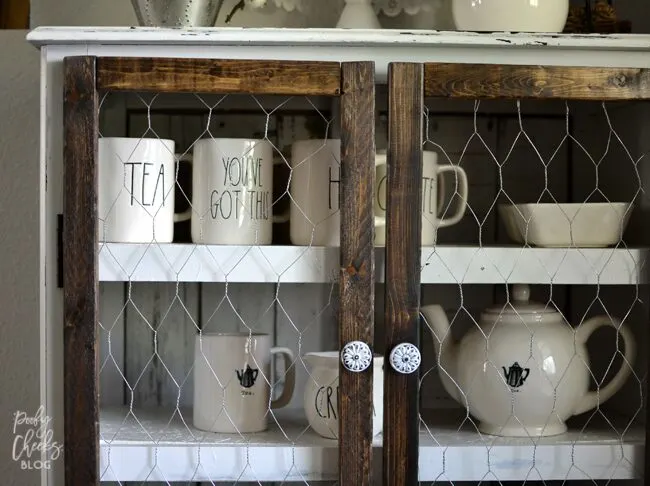
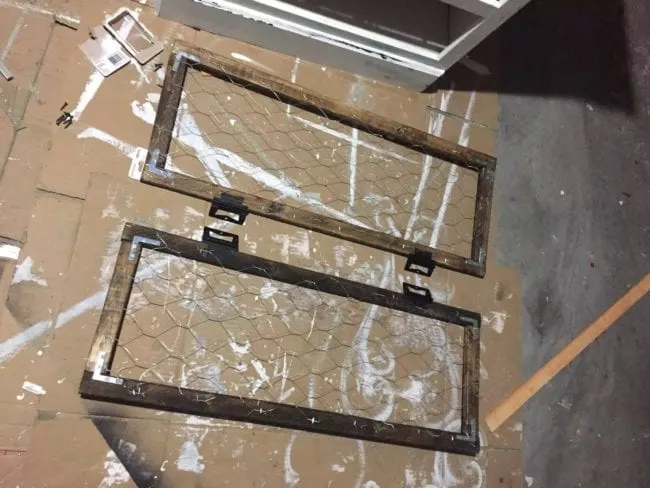
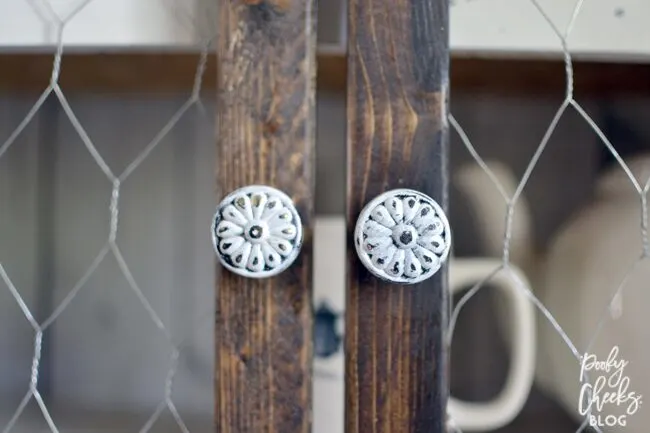
Using the same wood we used to create the molding, we used wood glue and some flat corner braces to create a couple of rectangular frames. After adding some chicken wire and hinges we had doors. It was at this point that we could really see a dresser transforming into a pie safe.


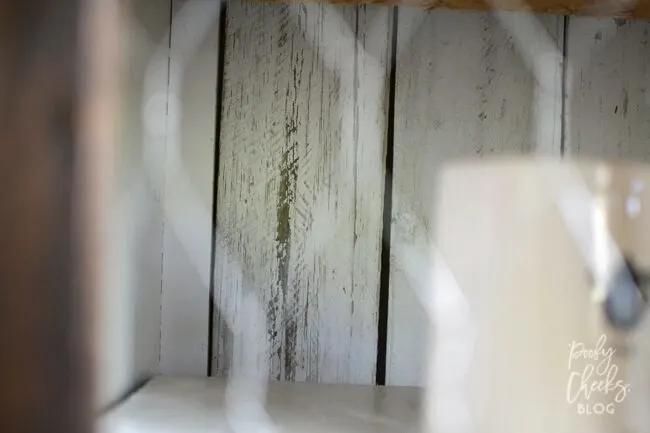
Our final step was to create a fun and unique backing. Tammy and I knew this would add to the overall character of the pie safe. We happened to have some old fence panels on hand and love the way they look lining the back wall of the piece.

We so enjoyed creating this and are so happy with how it turned out. Our hope is that Kelsey and her family enjoy it for years to come!

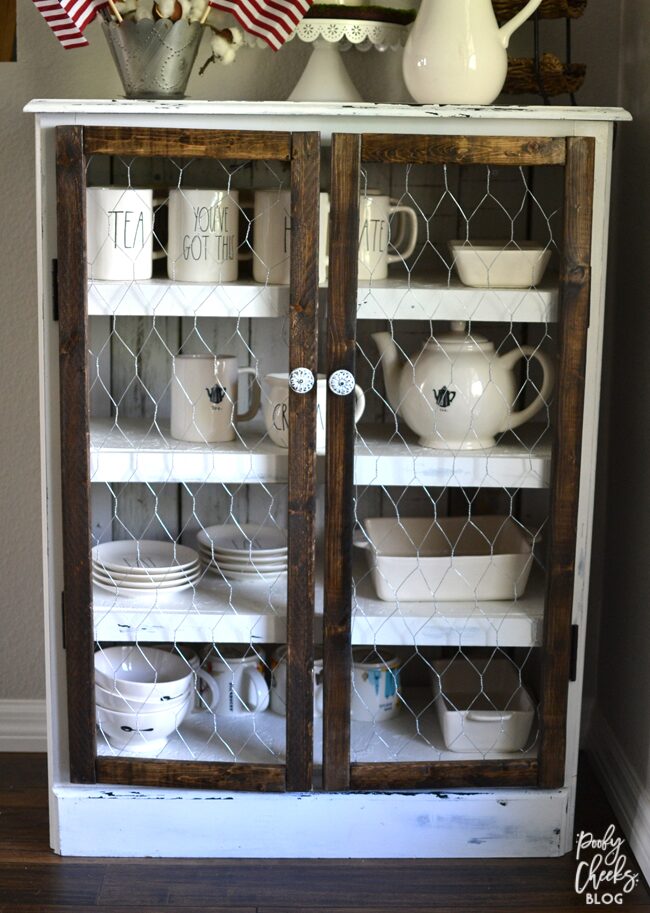
I seriously couldn’t be more overjoyed with how this piece turned out. -Kelsey

Pat Katin
Thursday 9th of August 2018
Hi Kelsey We were just at Panama City Beach Florida for vacation and we loved it. The beach was beautiful had some much fun we stayed a couple of days longer. Oh yes I loved your pie safe it’s so cute.
Kelsey
Thursday 9th of August 2018
I have never been but have heard their beaches are perfection. Thank you!!