Today I am showing you how to make a paracord survival bracelet. They are fairly simple and I have lots of pictures to show you how to make one step-by-step. I learned to make them from my husband who is an outdoors hunting and fishing type of guy. What is paracord you ask?
- It is also called parachute cord because it was used in parachute cords during WWII
- The military still uses paracord when applicable.
- It is nylon and comes in many colors!! It has a braided nylon outside with nylon strings on the inside too.
- Many outdoorsy people use it to make survival bracelets because if you were ever in trouble you can unravel it and have 8+ feet of cording and the many strings inside too.
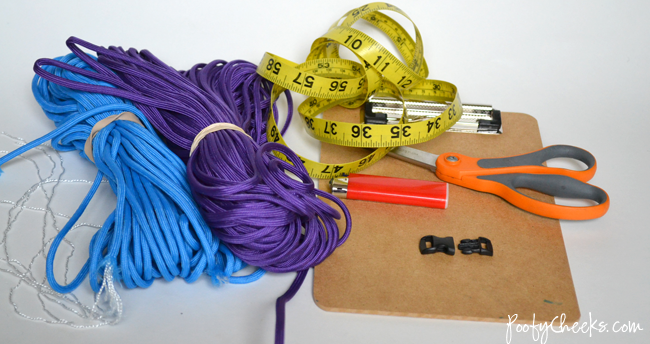
Why do I love paracord? For the colors of course!! Not only does it make pretty cool bracelets, but it makes amazingly bright key chains that I can easily find in my Mary Poppins purse! 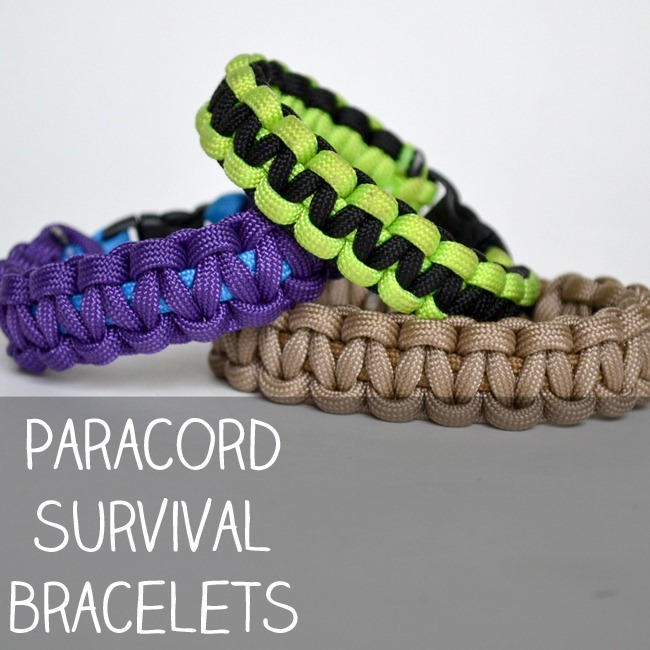 First you will need to gather your supplies-
- Scissors
- Lighter
- Paracord – about 10 feet depending on the wrist size. (Can often be found at army/navy surplus stores.)
- Ruler or measuring tape
- Clipboard (optional)
- Curved plastic clasp
 First you will need to cut your first piece of cord which is going to be in the middle of your bracelet. To figure out the size, loosely measure your wrist and then add two inches and double that. So my wrist measures 6 inches + 2 inches = 8 inches and I doubled it to make 16 inches. Loop the cord through one side of the clasp so that the two sides of the cord are even.
 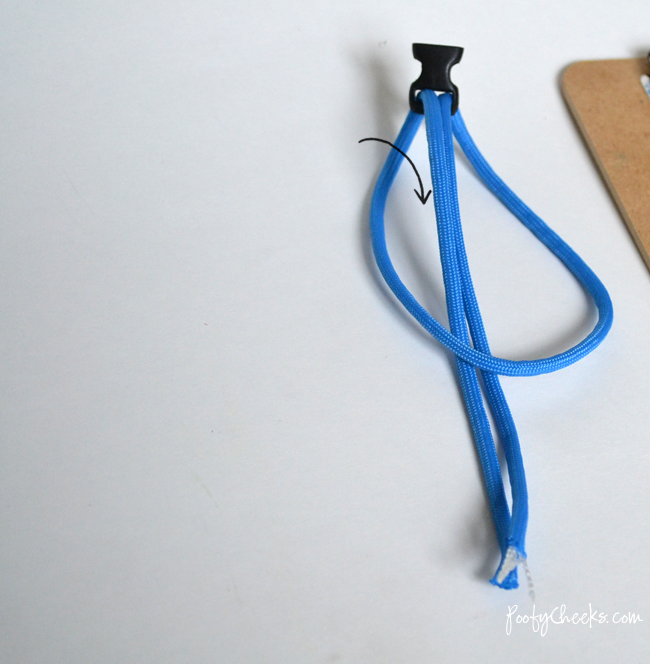 Make any necessary adjustments to make sure both sides are even and then pull tight.
 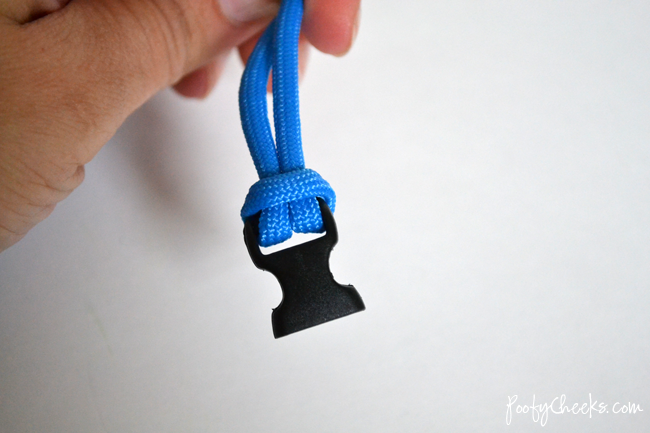 Now it is time to cut your outside piece of paracord. If you want a solid color bracelet then use the same color as you did for the middle, but I want a two-tone, so I cut a piece of purple cord measuring 8 feet long. As a rule of thumb you will use one foot of cord for each inch of bracelet, but I would rather have too much than not enough when I get to the end of my bracelet. Turn the clasp so that the ride side is facing down and do a criss-cross knot with the second piece of cord right below the loop you made.
 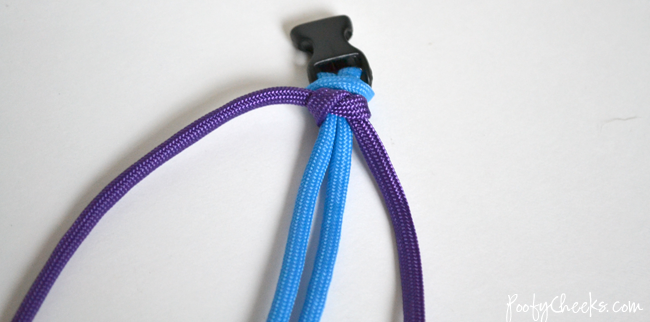 Now turn your cord and clasp back over so that the right side is facing up and the knot is facing down.
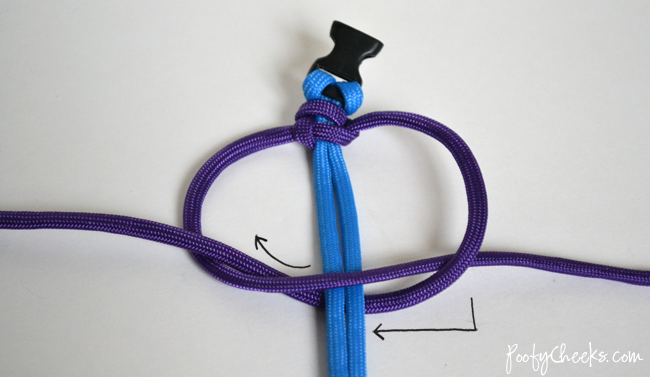
 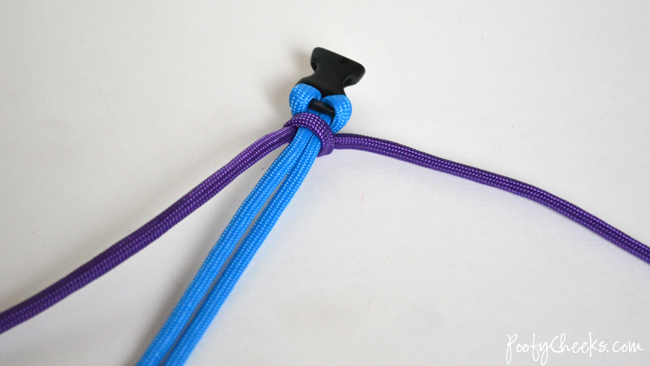 Now one side of outside cord will be going up, while the other is down. Below I have an arrow pointing to the right side where mine is going up. Take that piece and cross it over the top of the middle cords.
 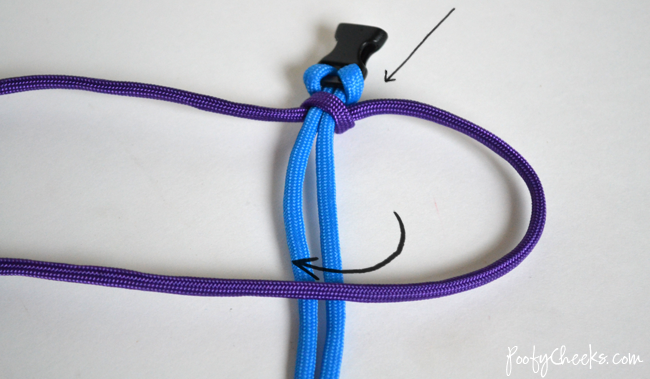 Take the left side of your outside cord and cross it over the right side going straight down.
 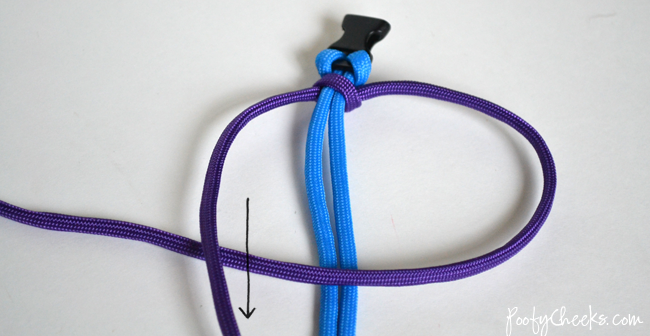 Now turn the left side under the middle cords and up between the middle cords and the right outside cord.
 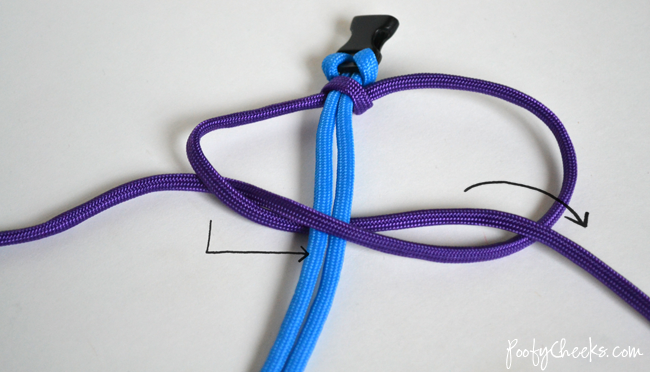 Pull tight and you have your first step of the cobra weave.
 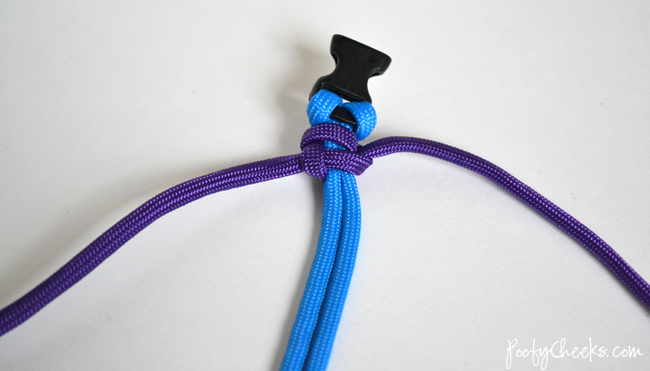 Now we are going to repeat the same steps but we are going to mirror them on the other side.
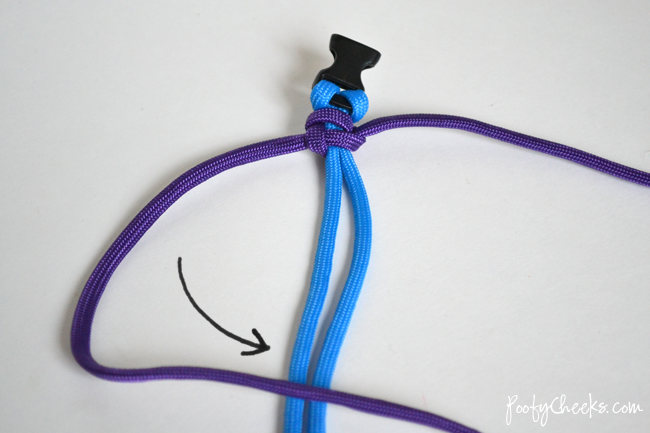
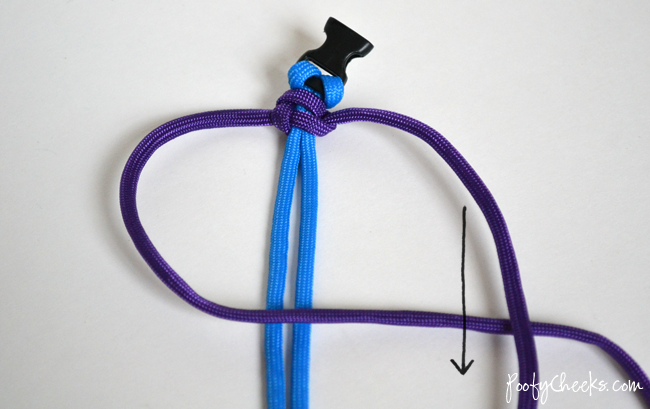
 Now keep alternating back and fourth.
 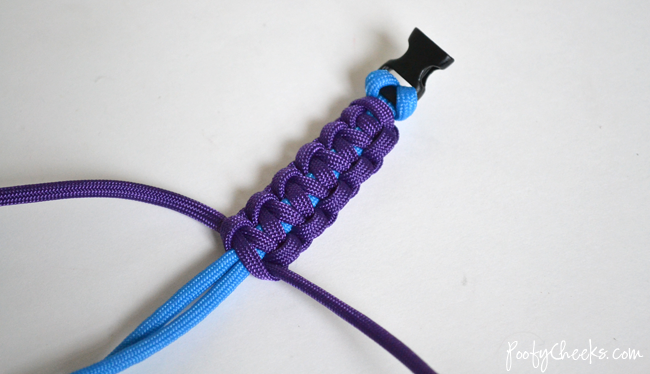 Once you get the bracelet to the length that you want it it is time to attach the other side of the clasp. Put the two middle pieces of cord through the clasp.
 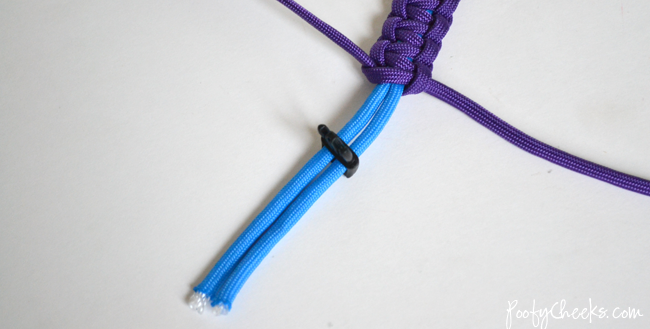 Fold the two pieces of middle cord underneath and back towards the other side of the bracelet.
 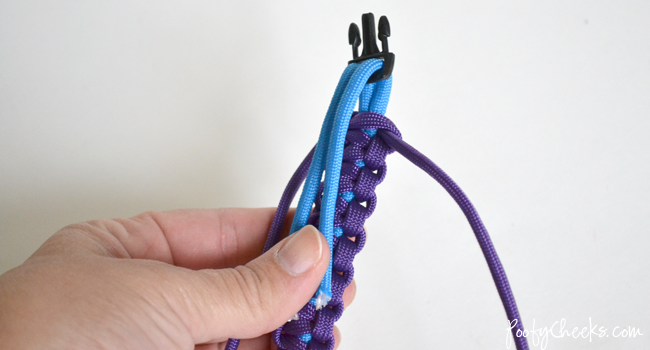 Now do one more step of the weave over top of the middle cording and pull tight.
 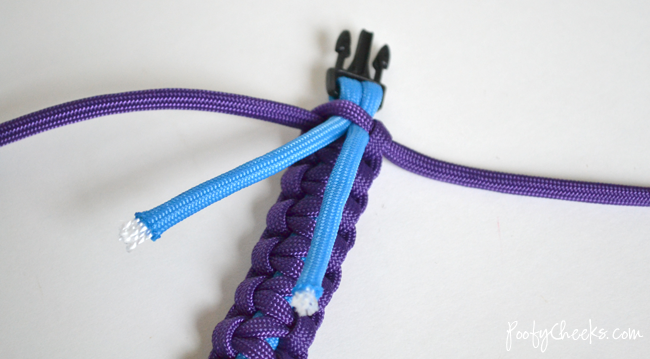 Trim the middle cords down leaving a little bit hanging out.
 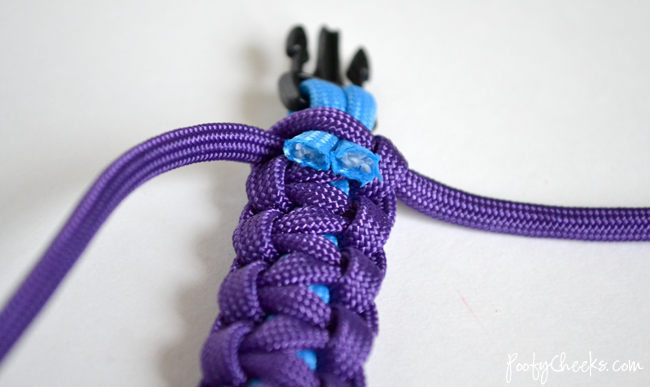 Using the lighter melt the ends of the blue cords and then push down with the side of your scissors so that it is melted to the purple (outside) cording. I suggest doing this twice to ensure that they are fused.
 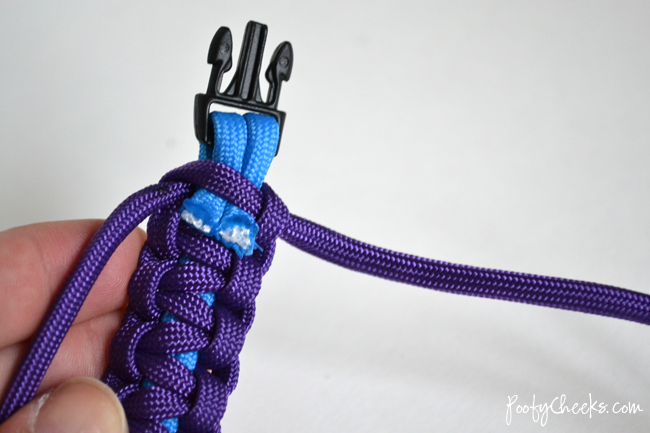 Now trim the edges of the purple cording and use your lighter to fuse them to the surrounding cording so the weave does not come undone.
 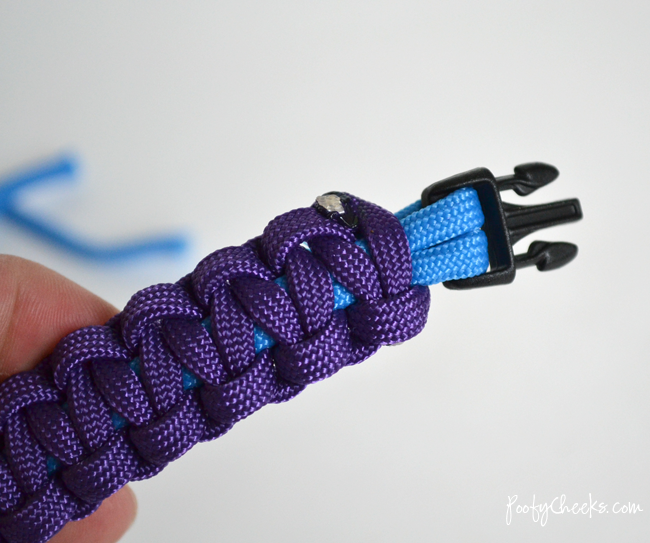 Now you have a survival bracelet that you can be proud of. These bracelets can withstand lots of rough wear and tear and to clean them just get in the shower with it.
 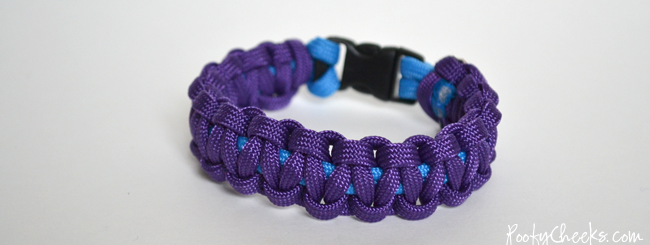 To make a keychain follow the same instructions by starting your initial loop on a key chain, knotting the middle cords at the end and melting the side cords together. Enjoy,

 >
>


mintu dad
Sunday 6th of November 2016
Thanks
Alisa Stevenson
Friday 5th of August 2016
Whether you’re planning to go camping or are preparing a bug out bag for when those big emergencies hit, you want to make sure you’re ready for anything that comes your way. What you may not realize is that one of the most helpful tools is so small, that you won’t have to worry about it taking up any extra space in your bag. See more http://myoutdoorslife.com/diy/paracord-bracelet-uses.html
Anonymous
Friday 24th of June 2016
Very easy and fun to do!!
sibbe-körv
Friday 17th of June 2016
my first time to do that it was fail for mee
Romilda Gareth
Monday 6th of June 2016
Your post is very helpful, thank you. Paracord bracelets, belts, necklaces, etc. became very popular in the past years. And there’s a perfect reason for that. They are super handy, you can attach any survival tool on them and can draw them out almost in a blink of an eye. See more http://survival-mastery.com/diy/useful-tools/paracord-bracelet-instructions.html